
“Renovating not only restores the house, but restores the story of the home and the neighborhood.” ~ Ty McBride
-

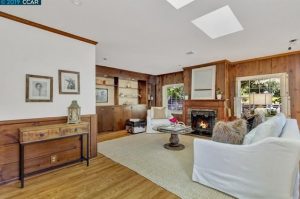
- Snowberry’s Real Estate Listing Photos
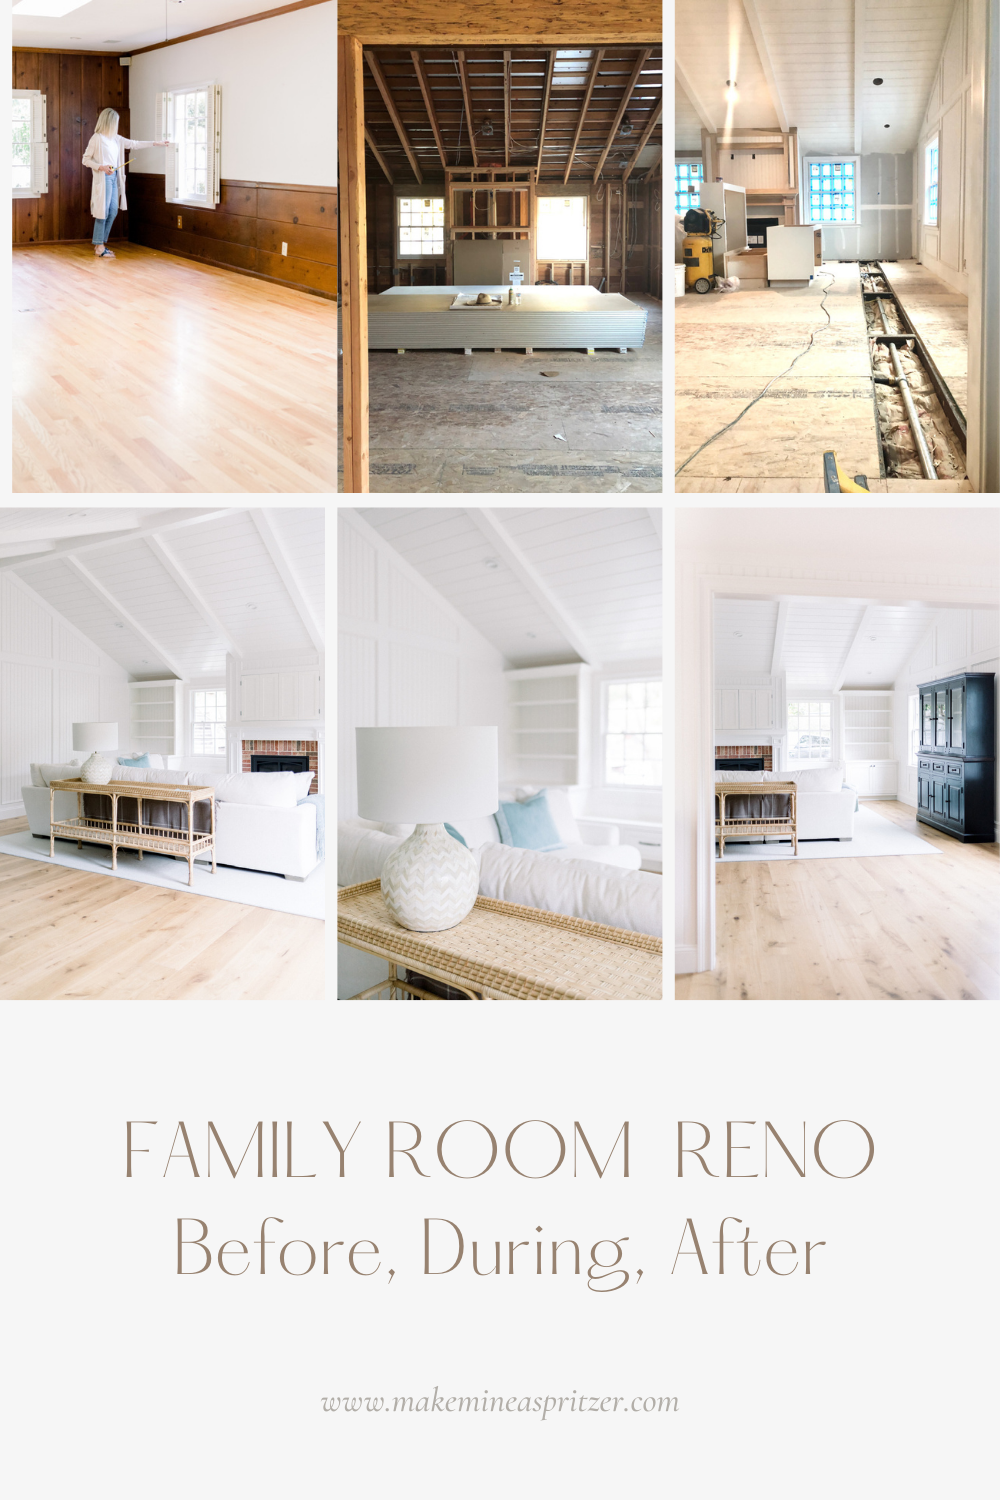
I’m excited to (finally) share Snowberry’s family room renovation!
Before, During, After
I’ve shown bits and pieces of the room on Instagram, but today it’s the whole enchilada.
You’ll find all the material sources at the end of the post.
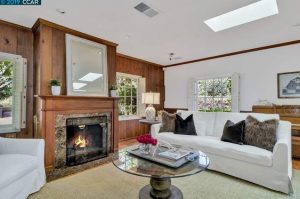
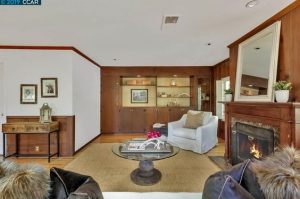
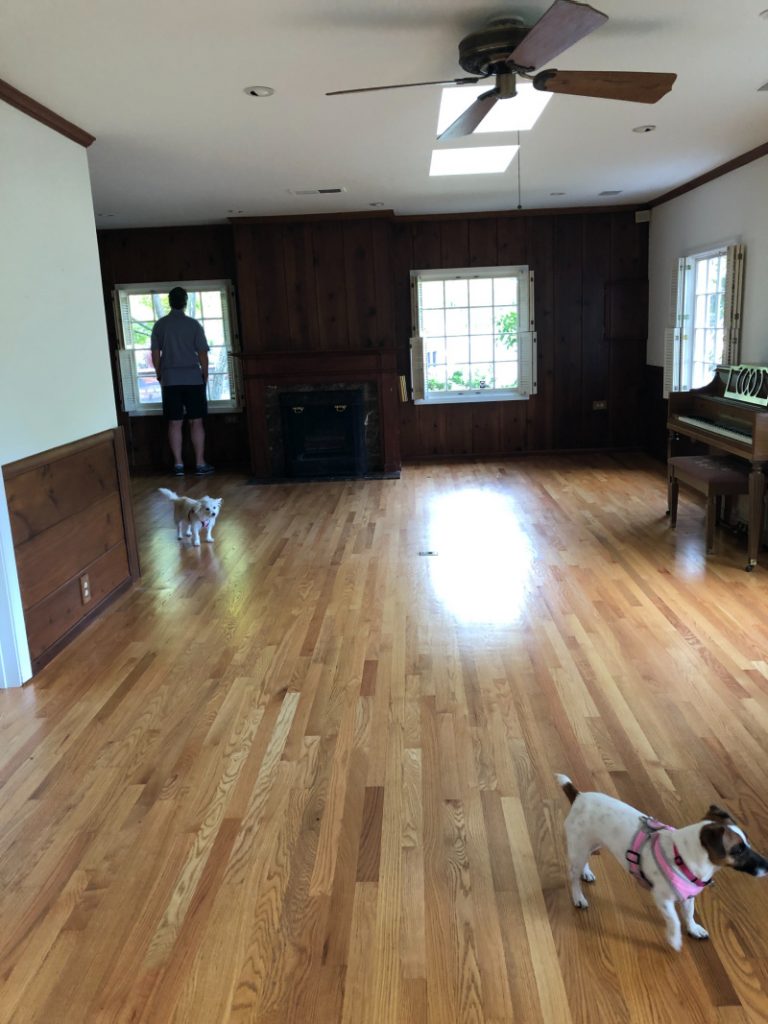
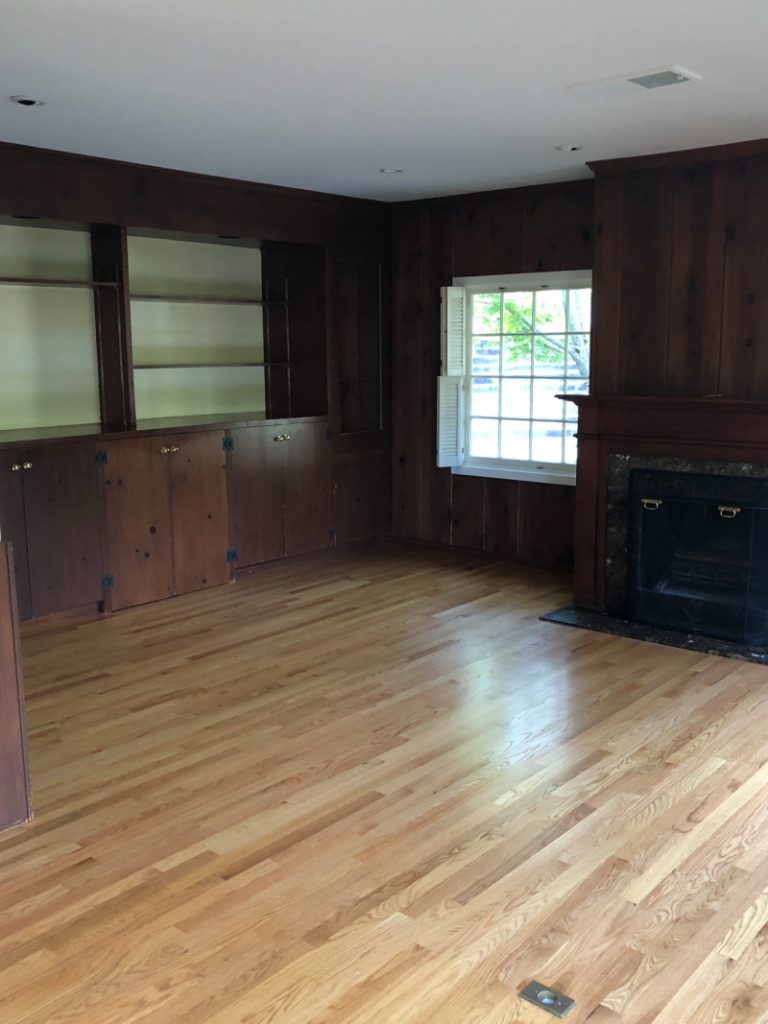
BEFORE
Monica Vargas Photography
When we took on Snowberry’s renovation the idea was not to create a new house … or to return the old house to its former glory. It was to allow the house to achieve the full potential of its original intent. And to create modern functionality while retaining the vintage charm.
Snowberry had undergone two prior renovations … in the late 1950’s and early 1960’s. The scope of that work connected the detached garage to the main house, adding a laundry room and small breakfast area and extending the main bedroom to incorporate a new bathroom and walk-in closet. After a lot of discussion and debate, we opted to work within the existing footprint. This meant not gaining a powder room or increasing the size of the main suite’s closet. I went into more detail about our decision process here.
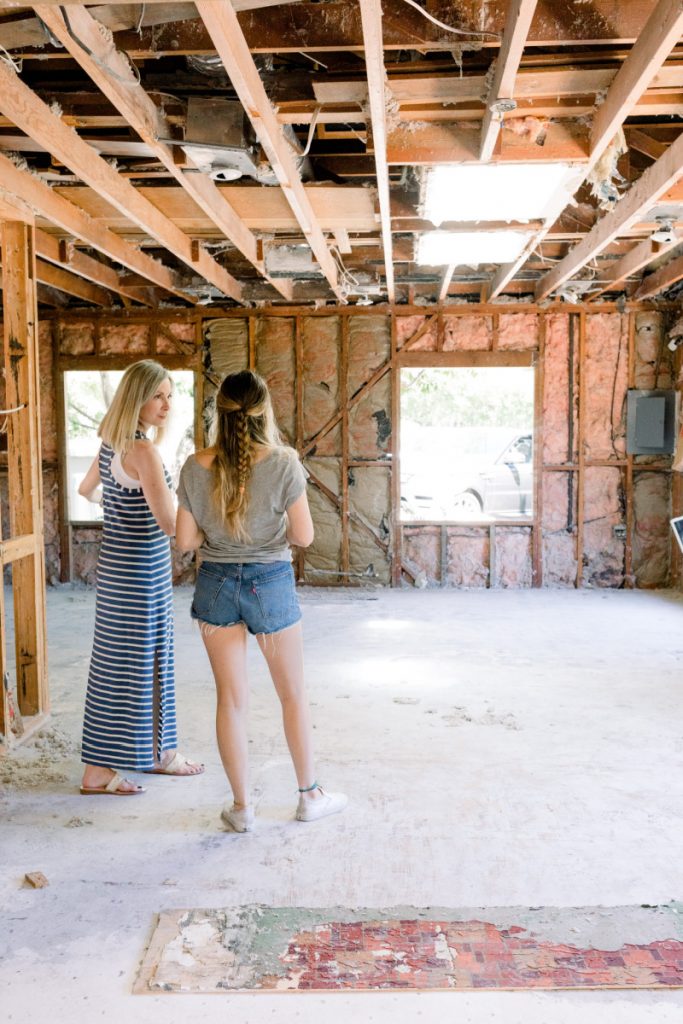
The wall to the left, just beyond the cased opening, is a laundry/mud room carved out of a corner of the family room. This situation had us scratching our heads. Taking a chunk out of an otherwise large, square room created an awkward situation for furniture placement and TV viewing. And let’s face it, TV viewing is the primary purpose of this space.
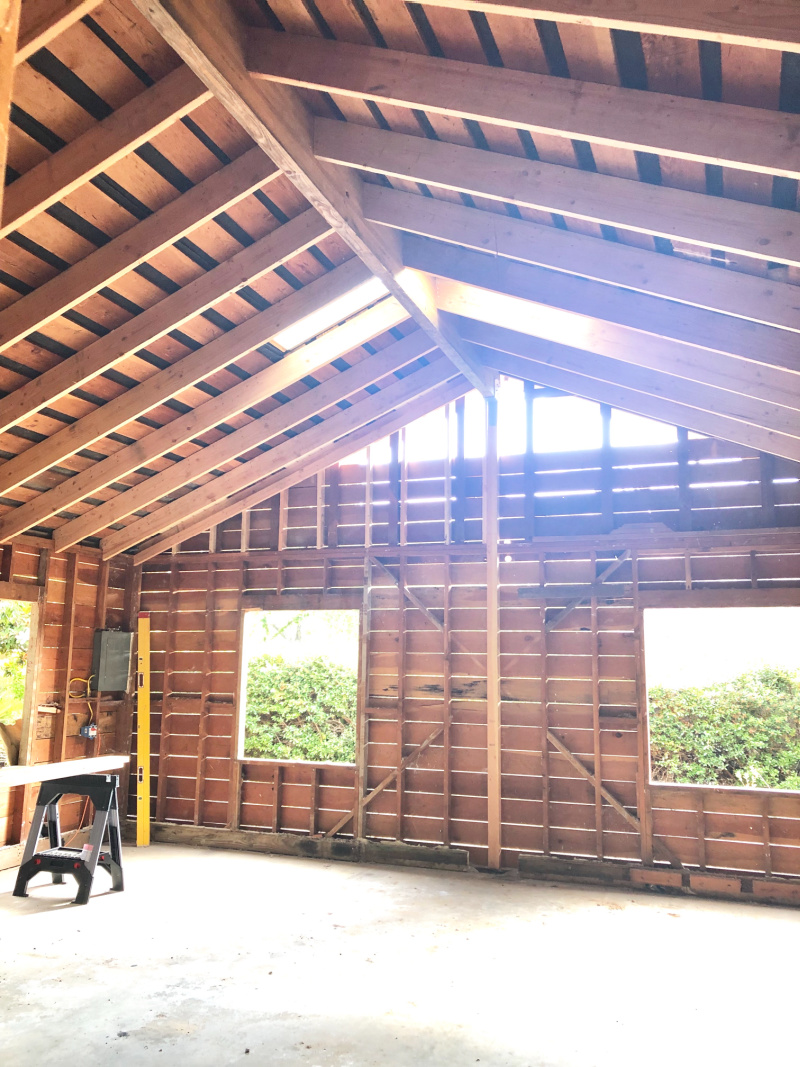
You can see how dark and claustrophobic the room feels. The ceilings were low and the dark paneling accentuates it. The floor was in decent shape and our first thought was to salvage and refinish it. Unfortunately it slopped dramatically and had to be removed in order to properly level. Mary Anne of Classic Casual Home pointed out that the windows were low and suggested we raise them as much as space allowed.
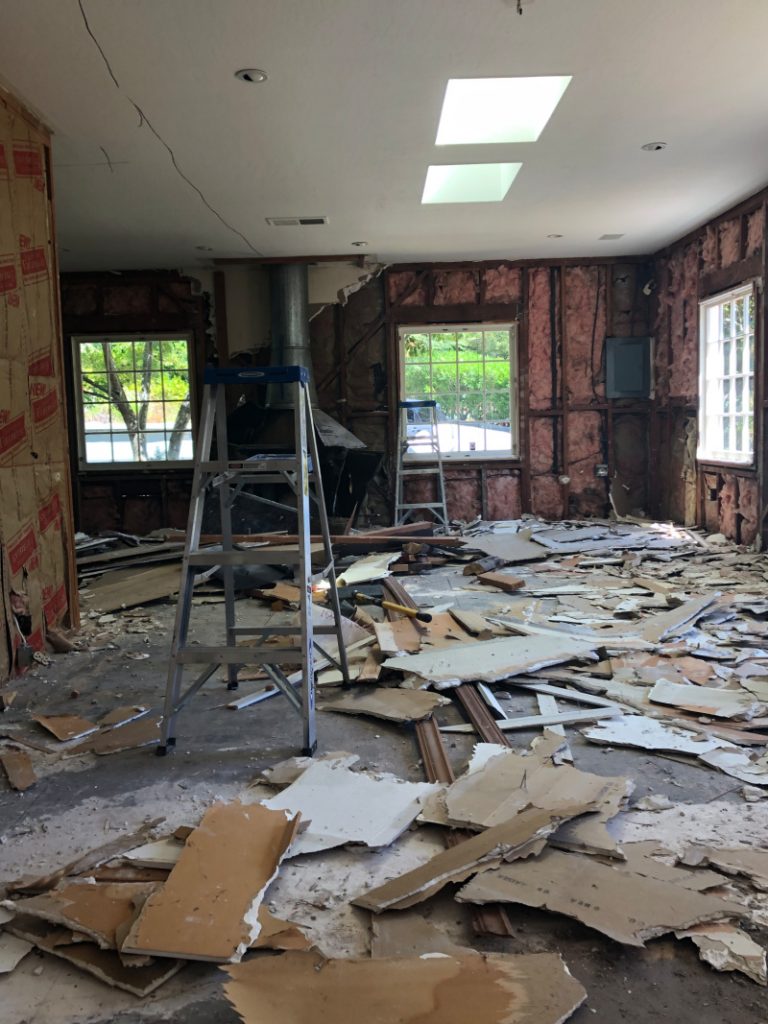
DURING
Demo ‘Day’ (for the entire house) lasted three weeks!
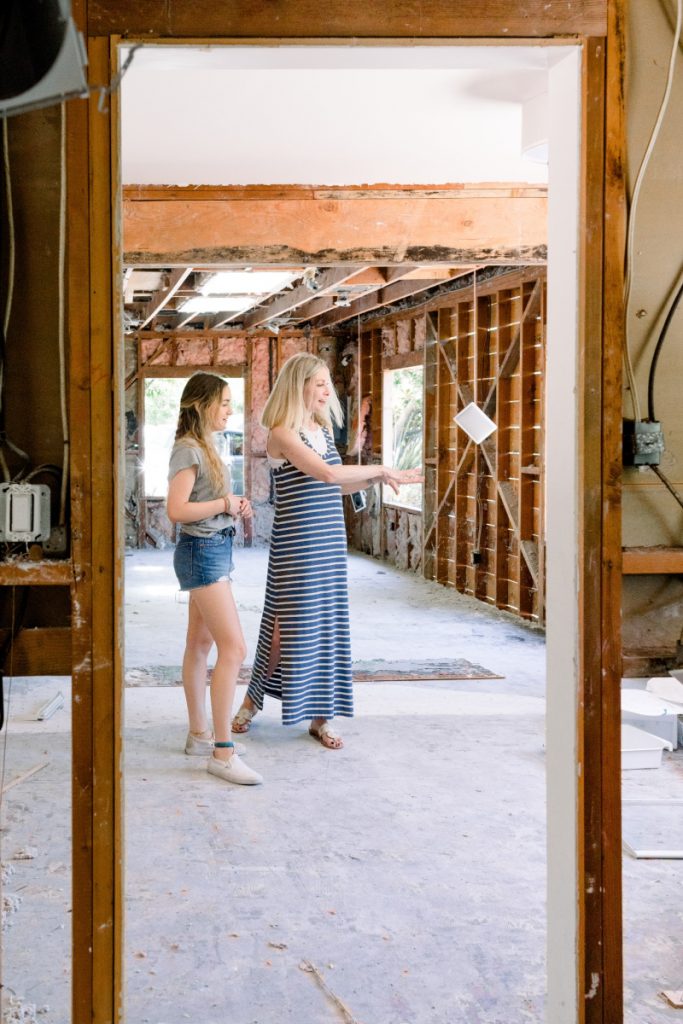
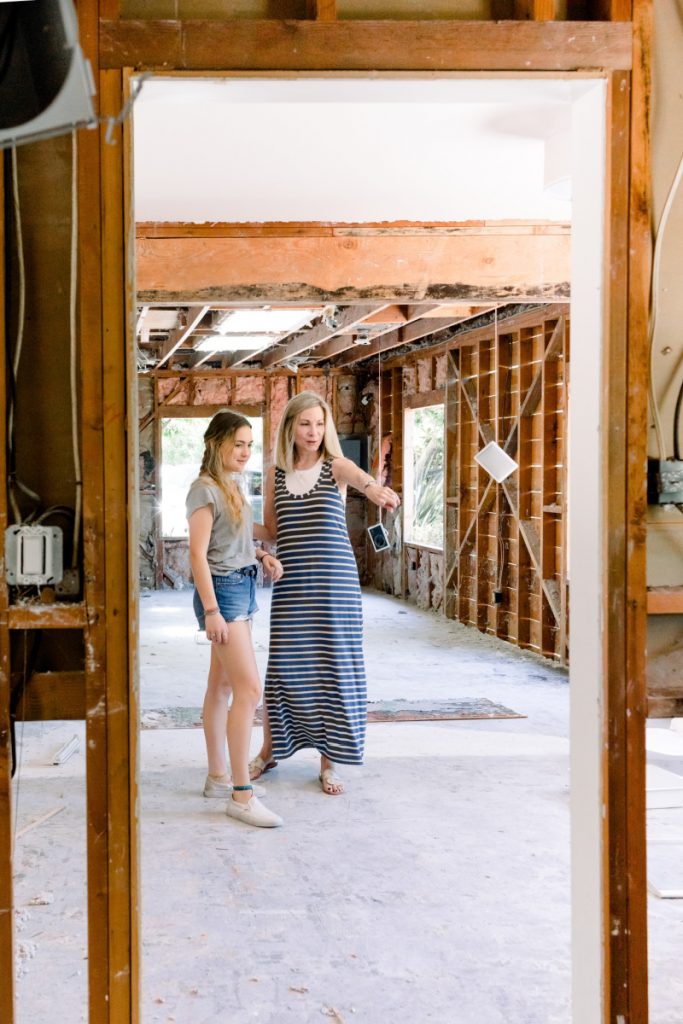
Halfway through demo my youngest niece came over to offer her opinion on the plans.
She has good taste and lots of ideas.
-

- During
-
- Monica Vargas Photography

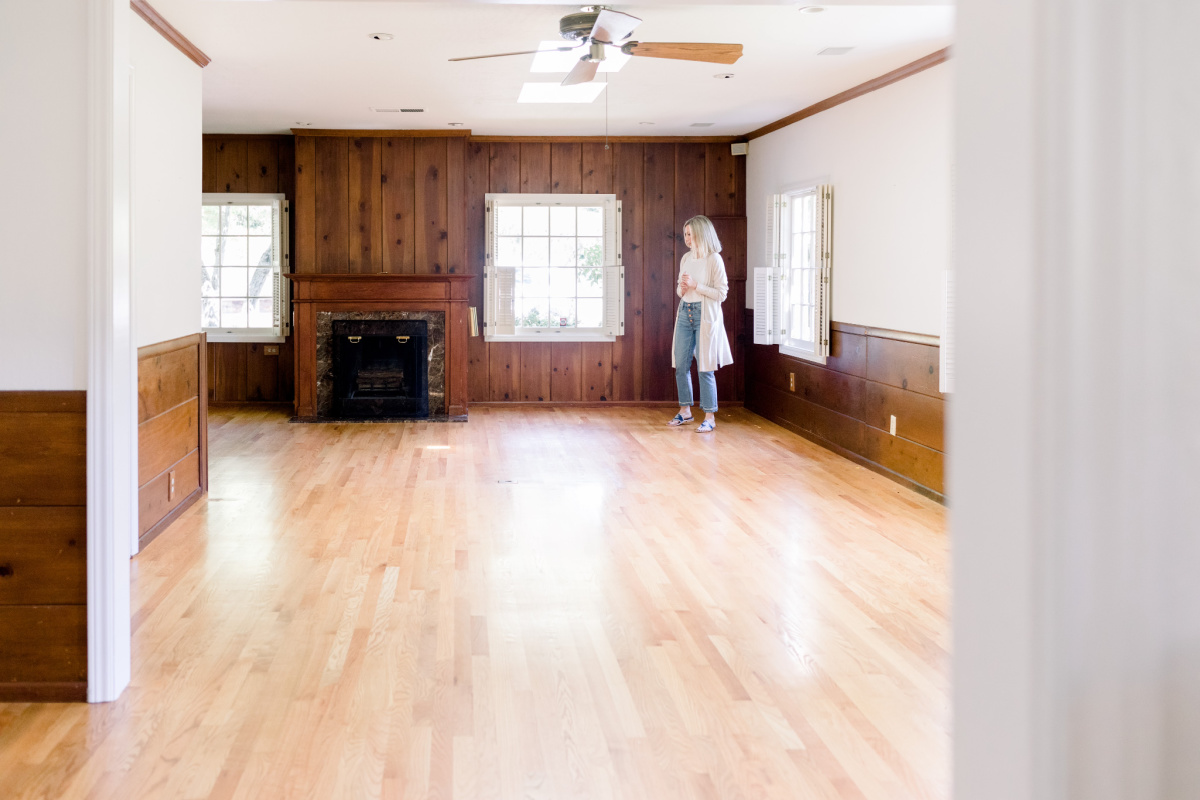
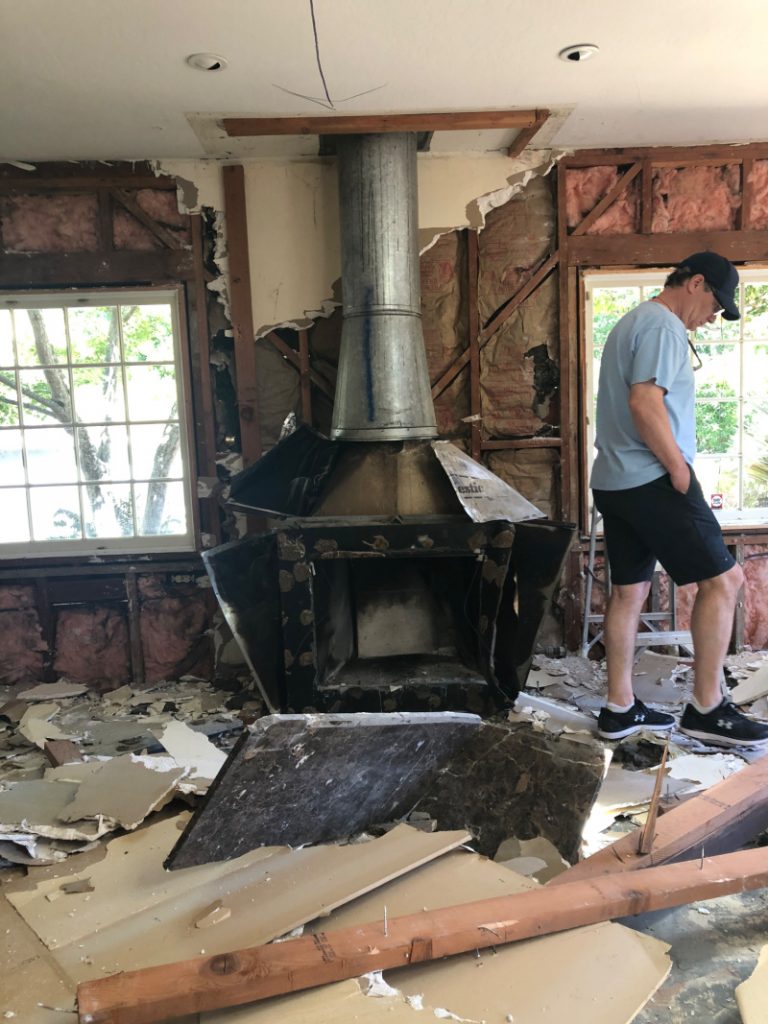
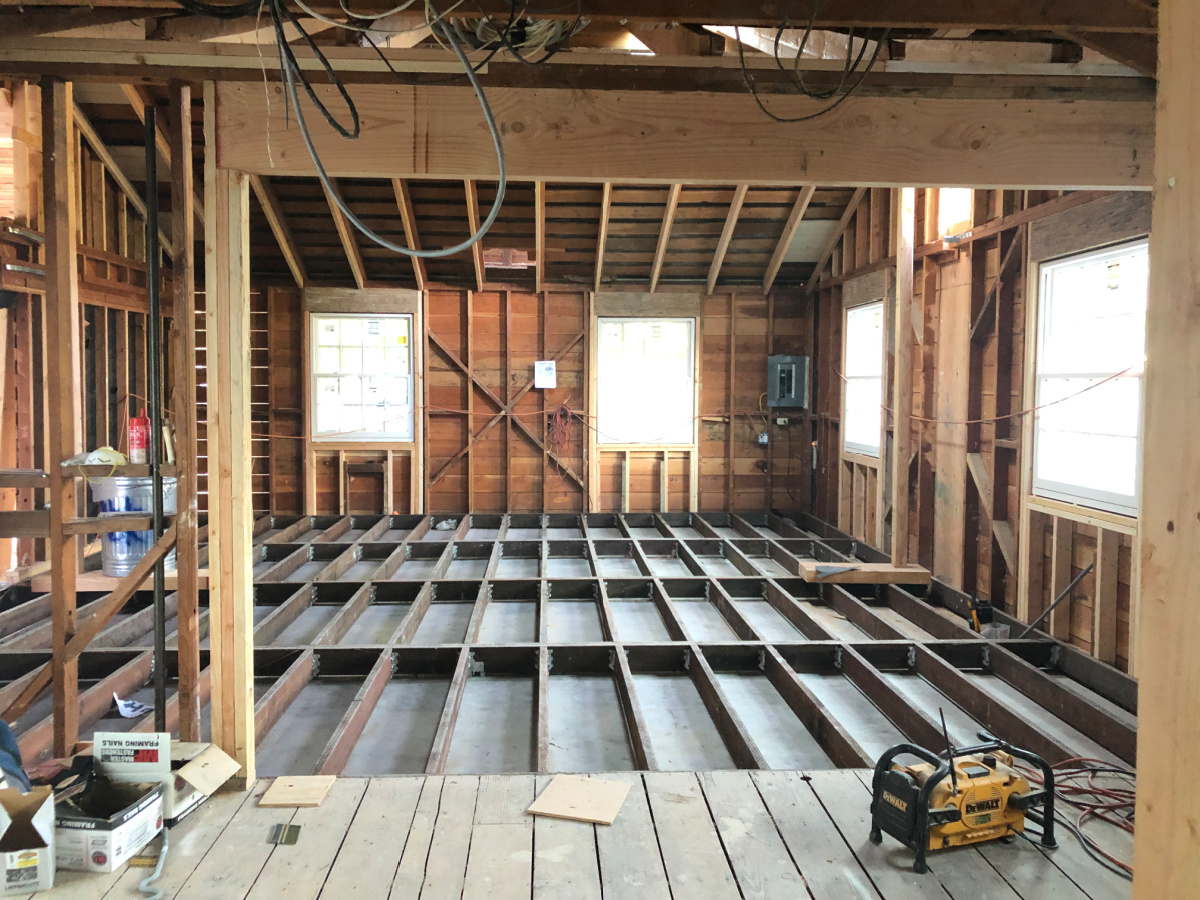
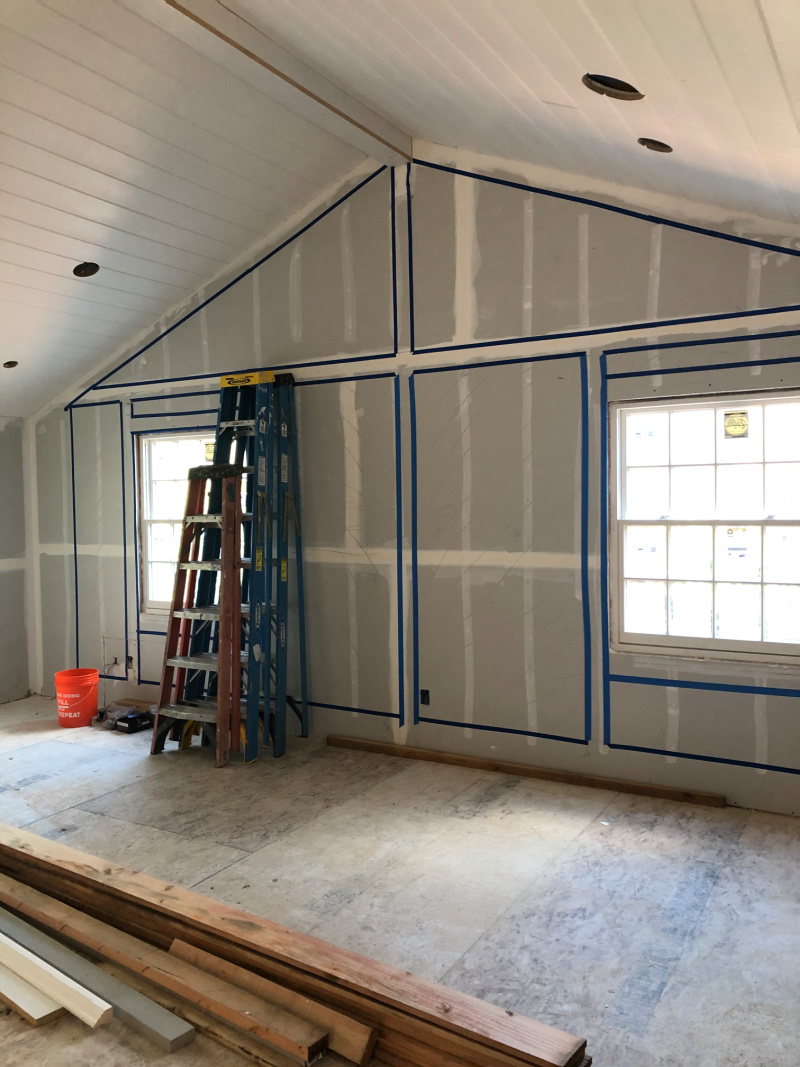
In this photo, the room is stripped but the laundry room framing remains.
The floor joists still need to come up in order to level the extremely sloped floor.
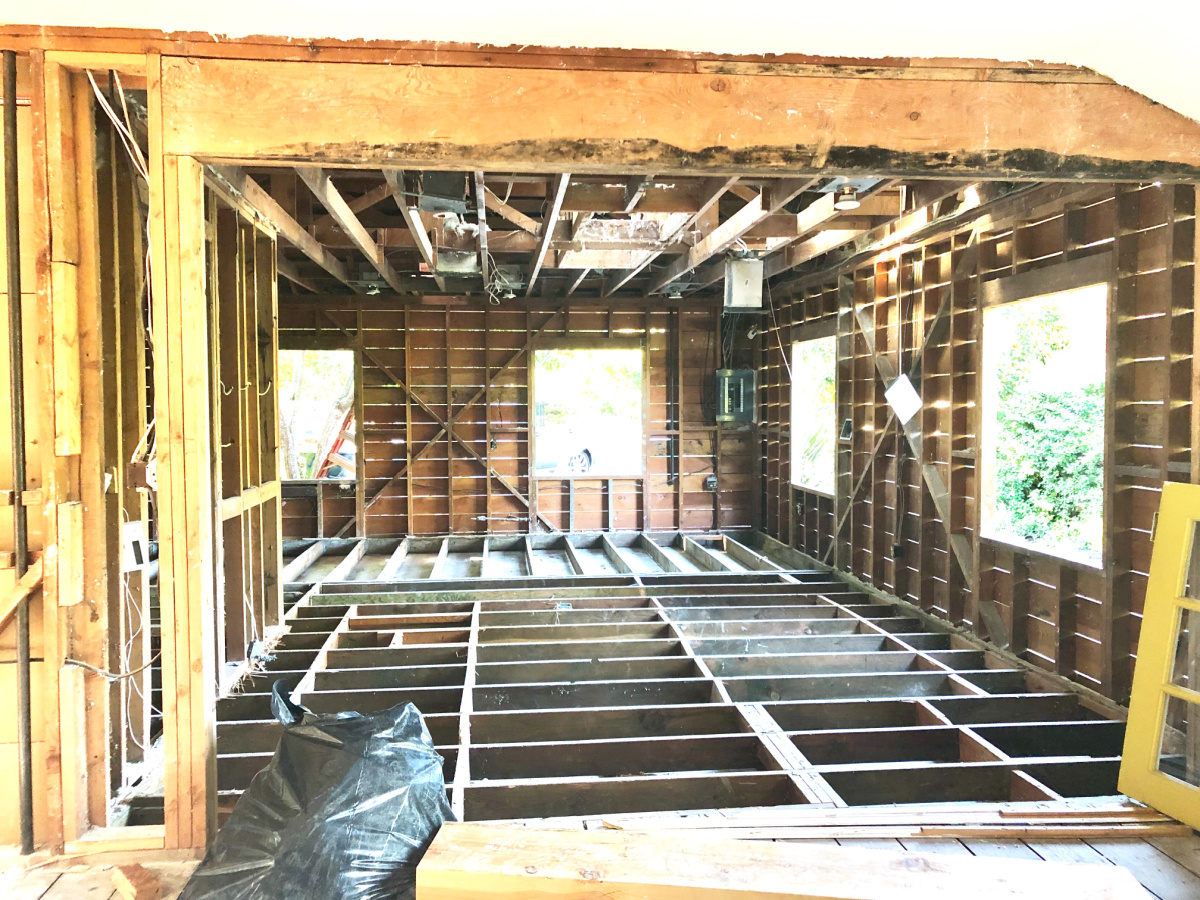
Removing the low ceiling makes all the difference.
Look at that pitch!
Now we’re getting somewhere.
The laundry room is gone, the new sub-floor joists are in and the windows have been raised about a foot.
The electrical panel is still on the back wall … soon be relocated to the center of the house.
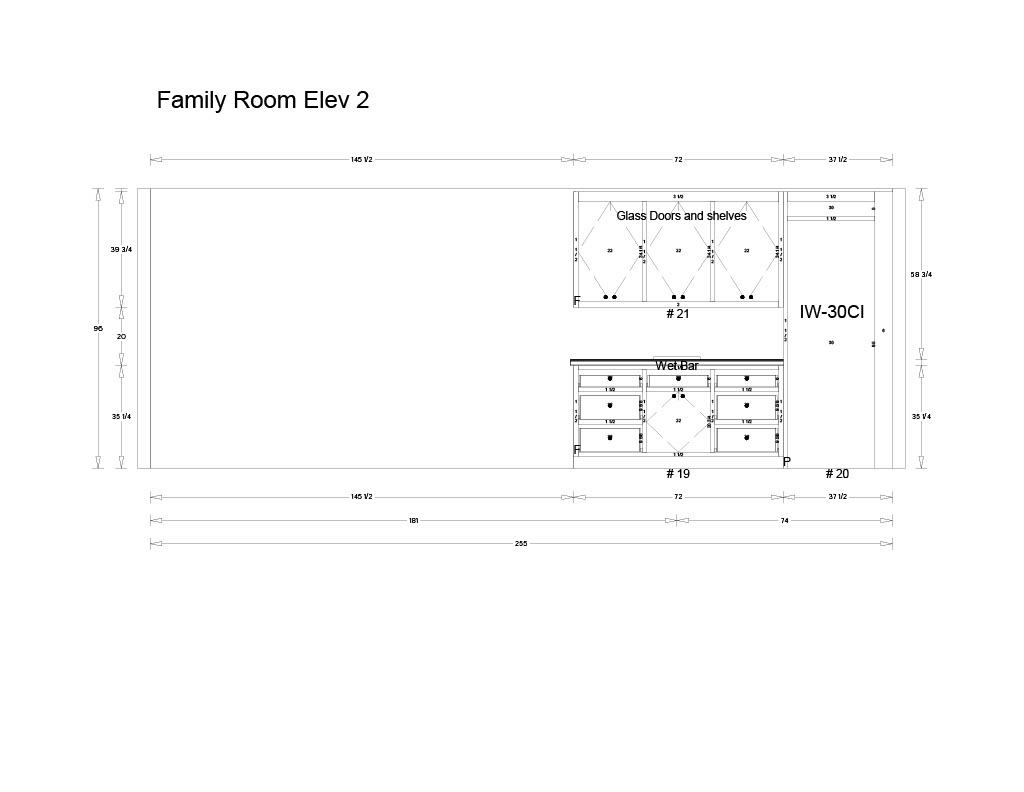
The room measures 23 x 23.
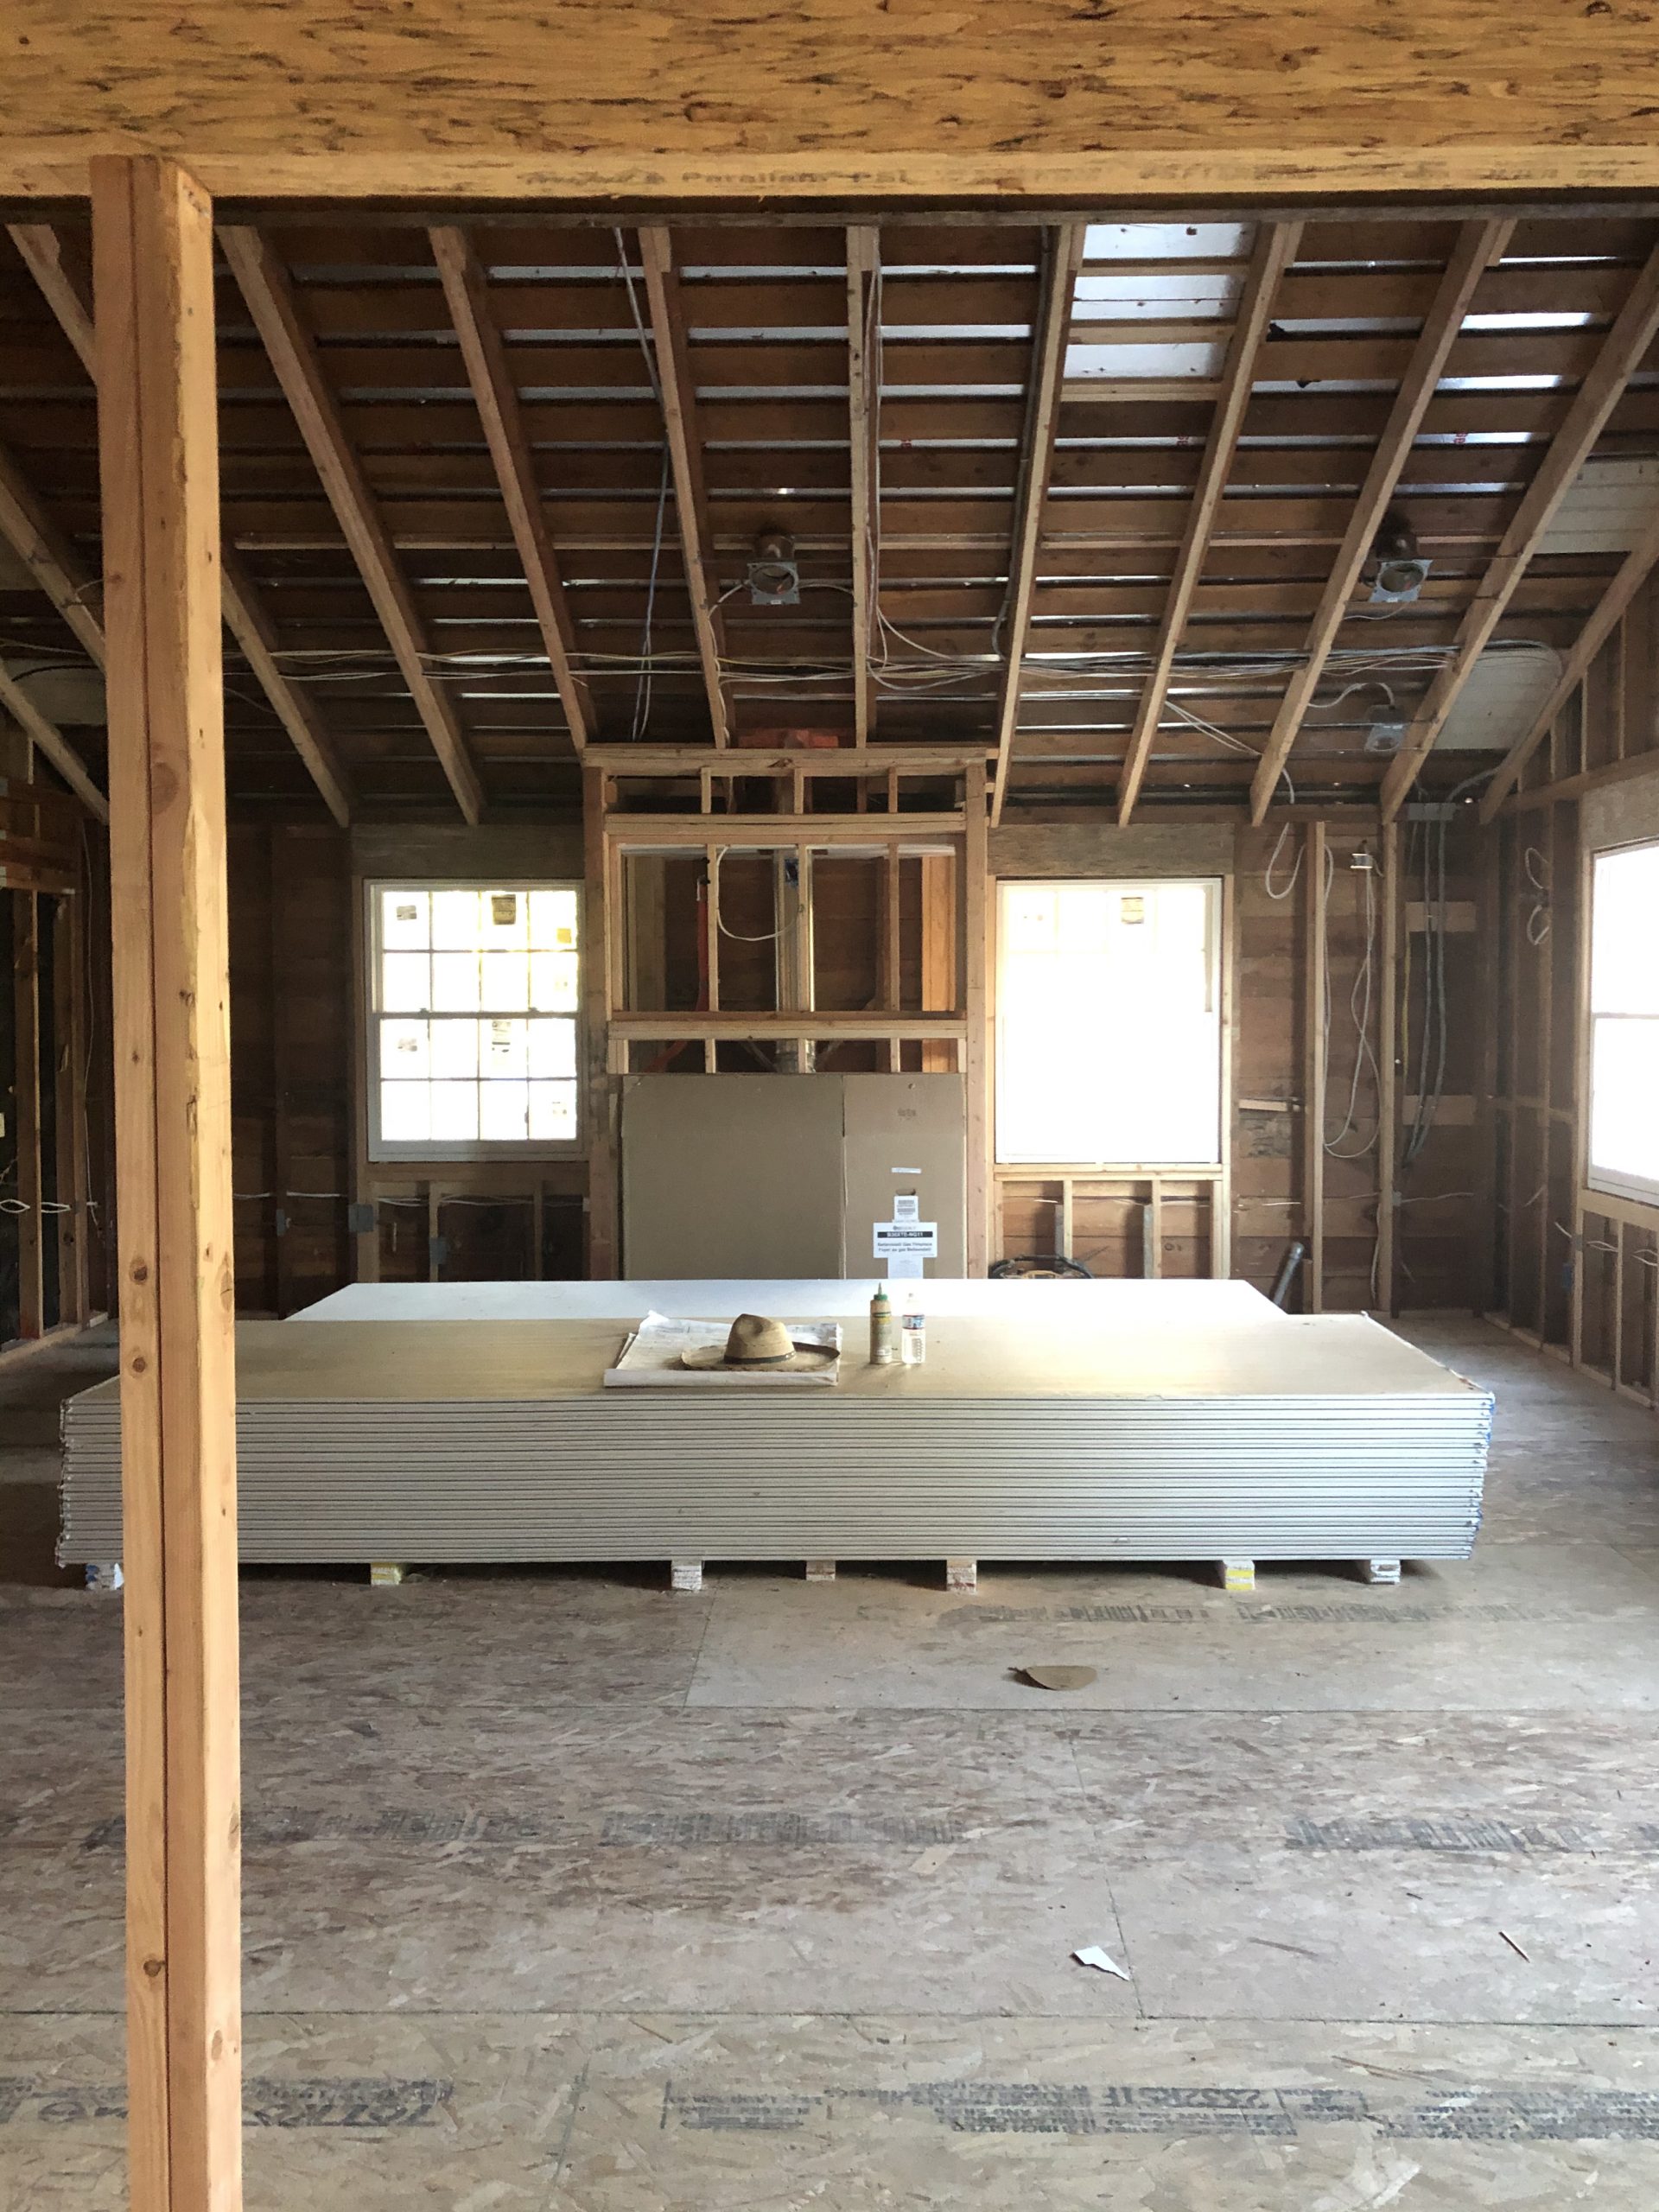
It’s a good day when drywall arrives and signals the rebuilding process will soon be underway.
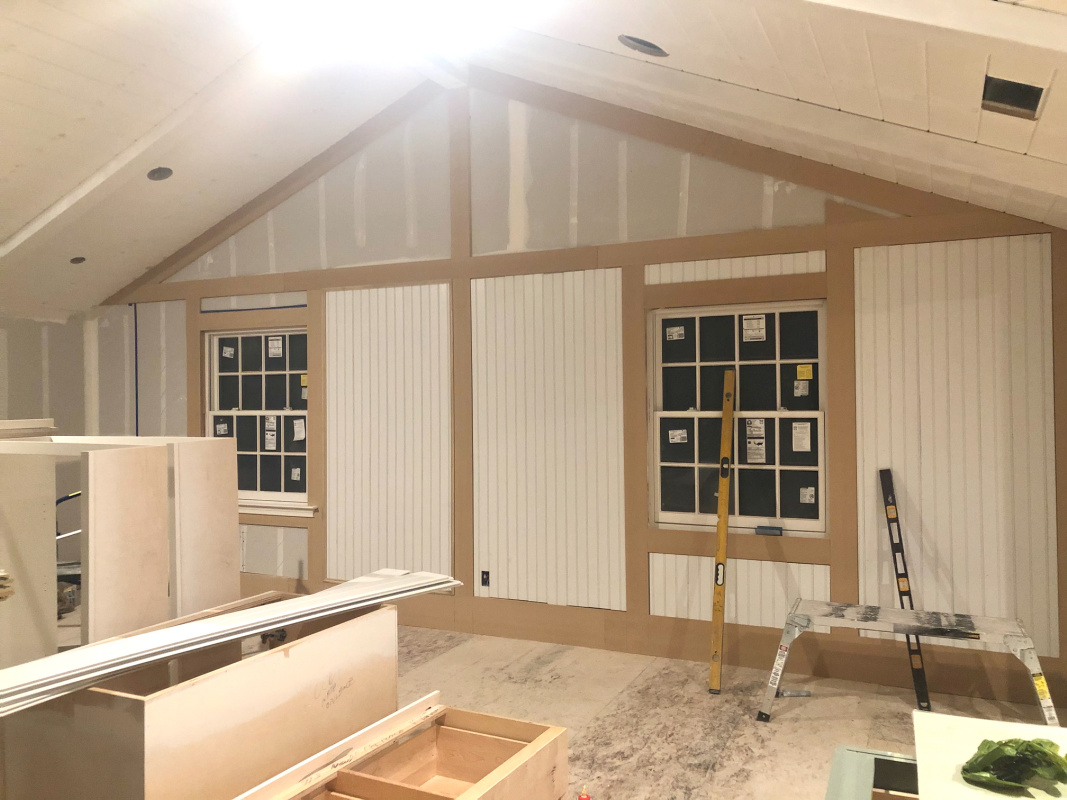
After drywall, Trevor – our millwork wizard – began laying out the bead board design.
All the walls in the family room, dining area and kitchen are bead board and the ceilings are paneled with v-groove boards.
Bead board is underway and faux beams added to the newly pitched and paneled ceiling.
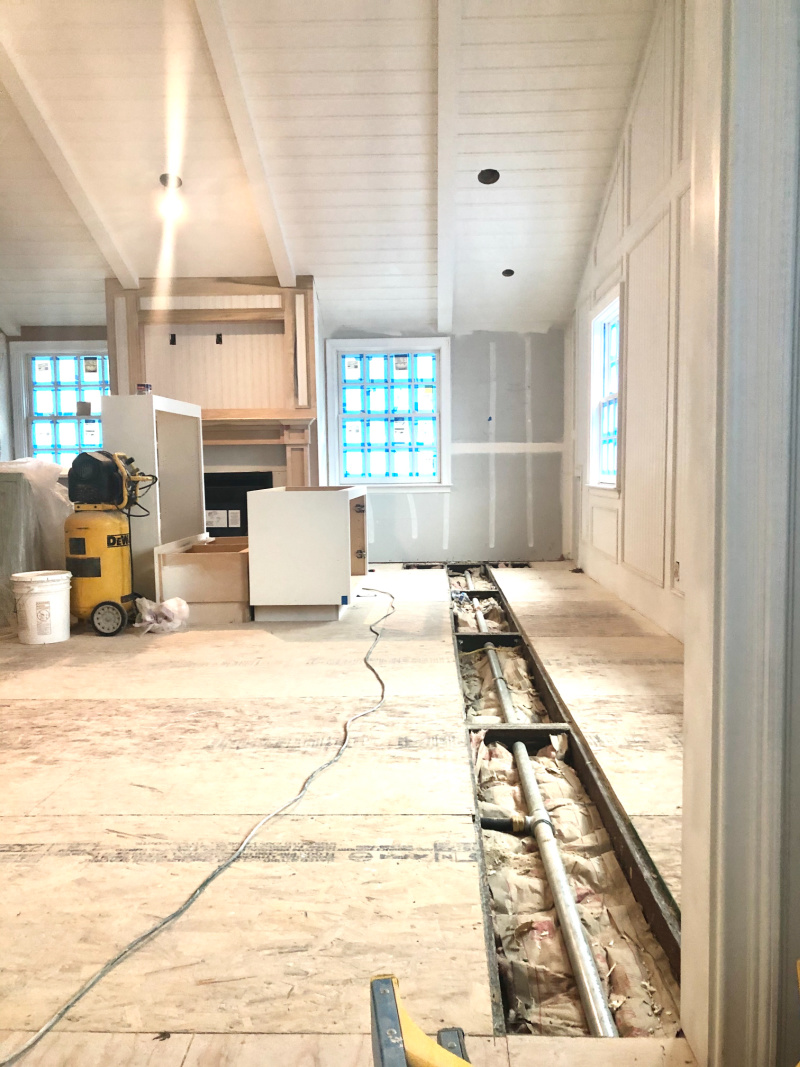
As soon as the subfloor was finished, fire season began. After several years of devastating fires, our power company decided to start shutting off power during particularly dangerous periods (dry, hot, windy).
During September and October we had power taken down on three separate occasions each lasting one to three days.
Realizing this to be our new normal we made a last minute decision to install a stand-by generator. In order to do that a new gas line had to be run the length of the house.
The new sub-floor had to be opened up to run the line.
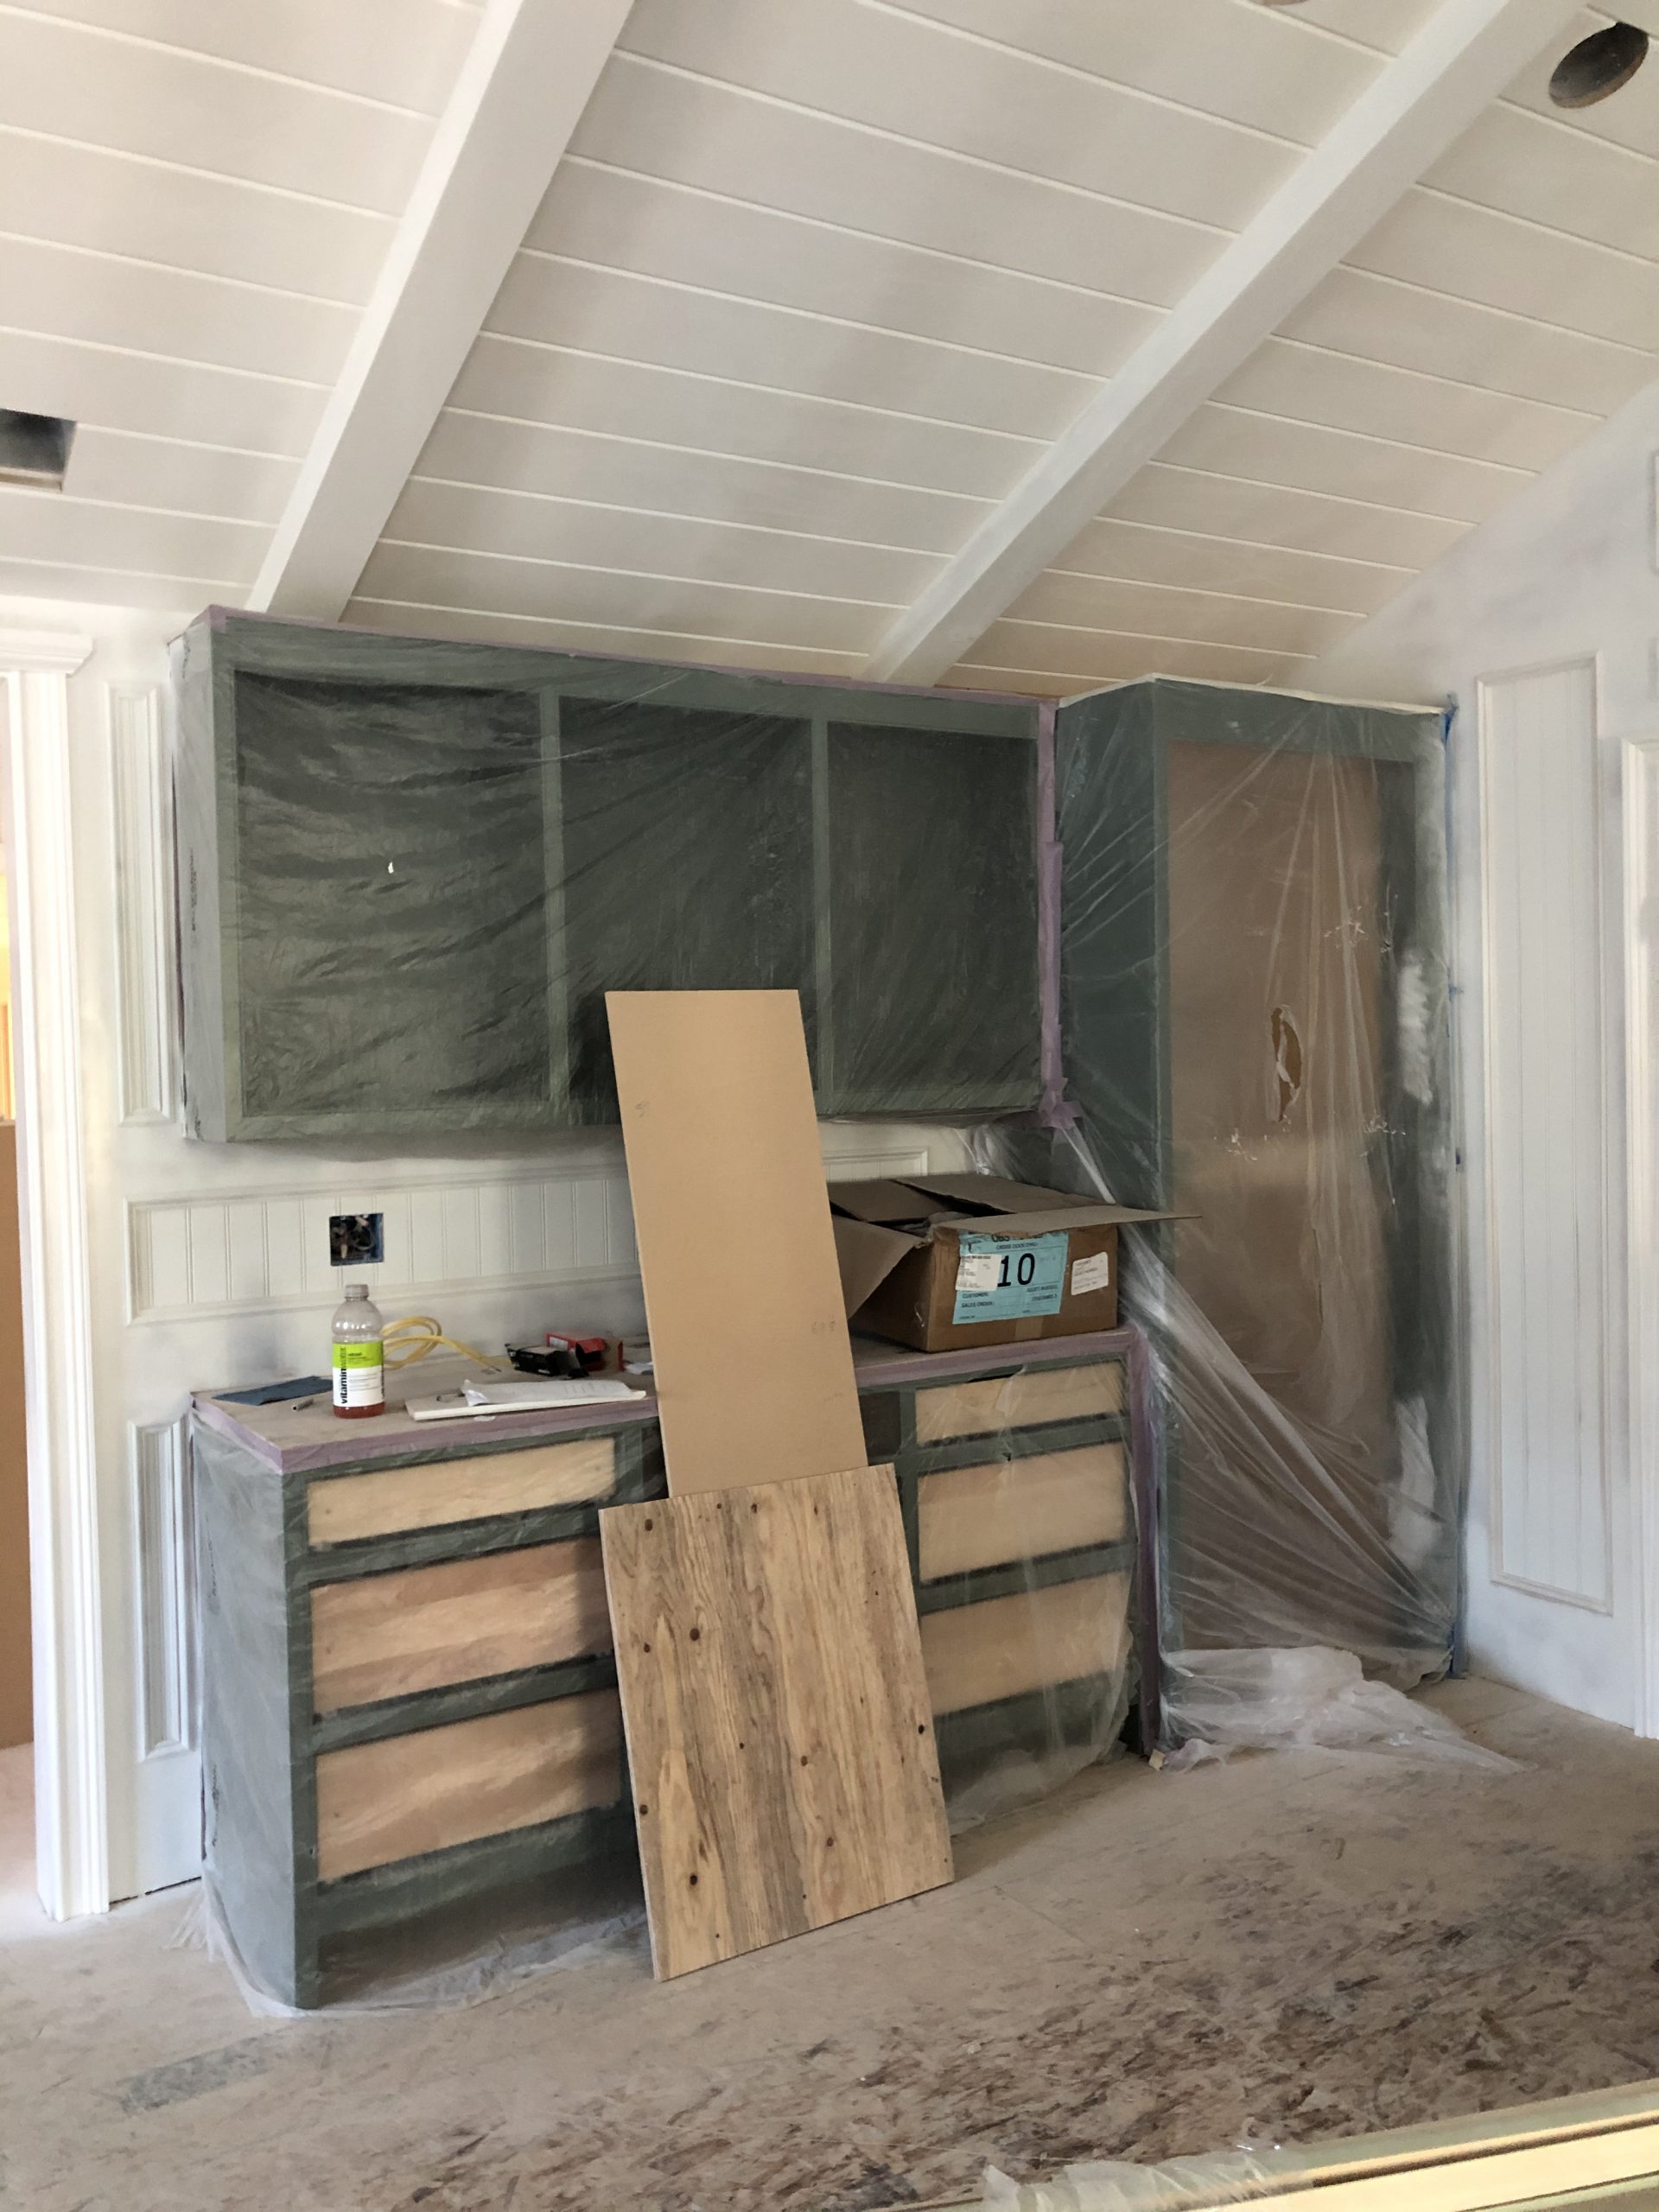
When cabinetry arrives things get real … real exciting.
The fireplace is flanked by window seats, lower cabinets with upper shelves.
The fireplace mantle, surround and recessed TV cabinet were built onsite.
The beverage bar is in the back of the room where the oddly placed laundry room used to be.
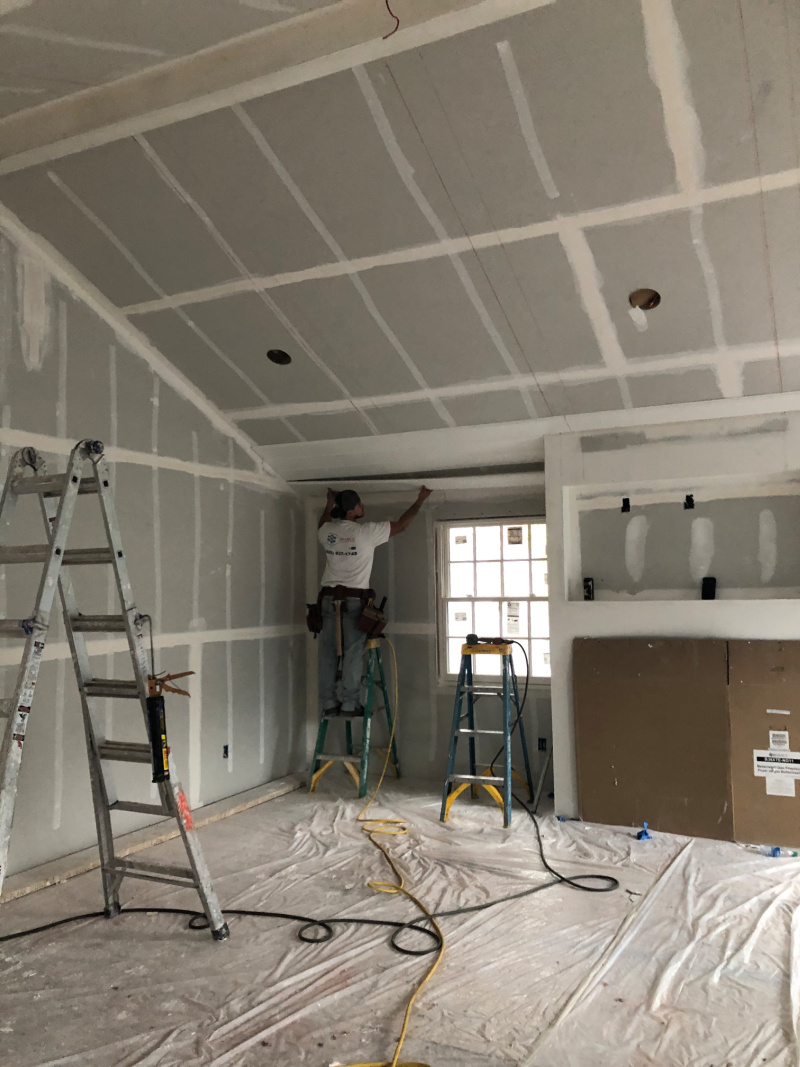
 After the cabinetry is installed, painting gets underway.
We used Benjamin Moore White Opulence for the millwork, moulding and trim throughout the house.
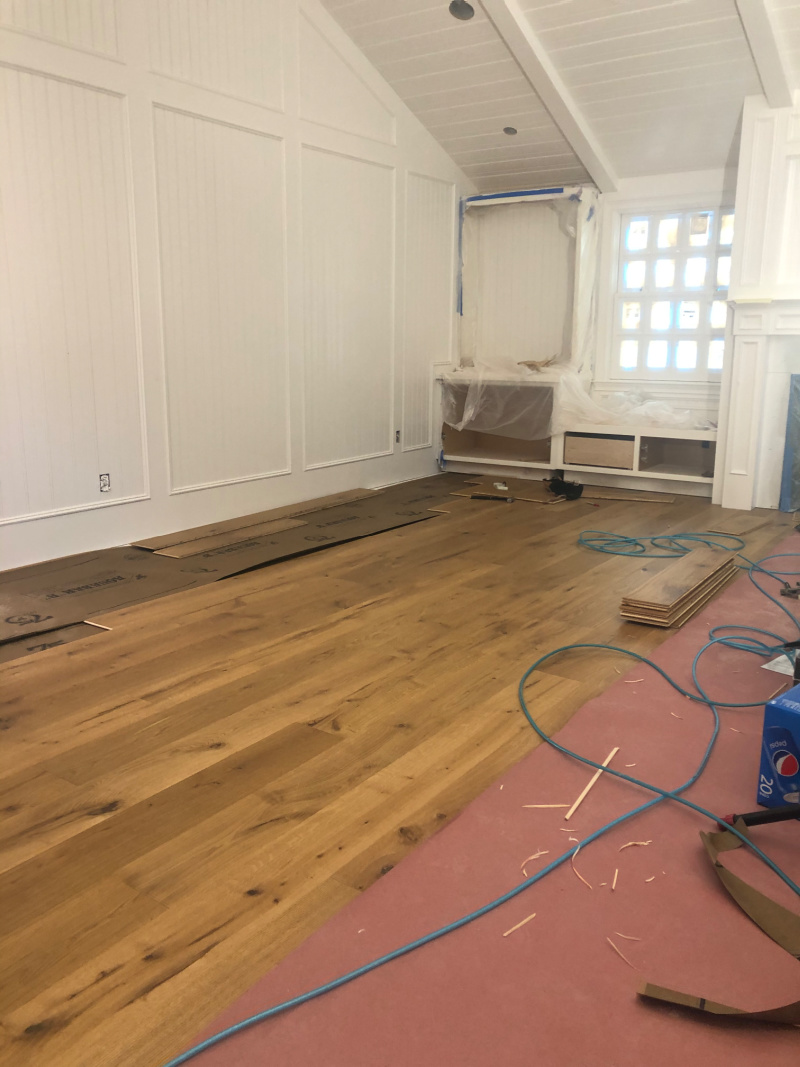
Flooring is going down. Yay! We’re on the home stretch.
We chose a wide plank, European Oak engineered wood floor.
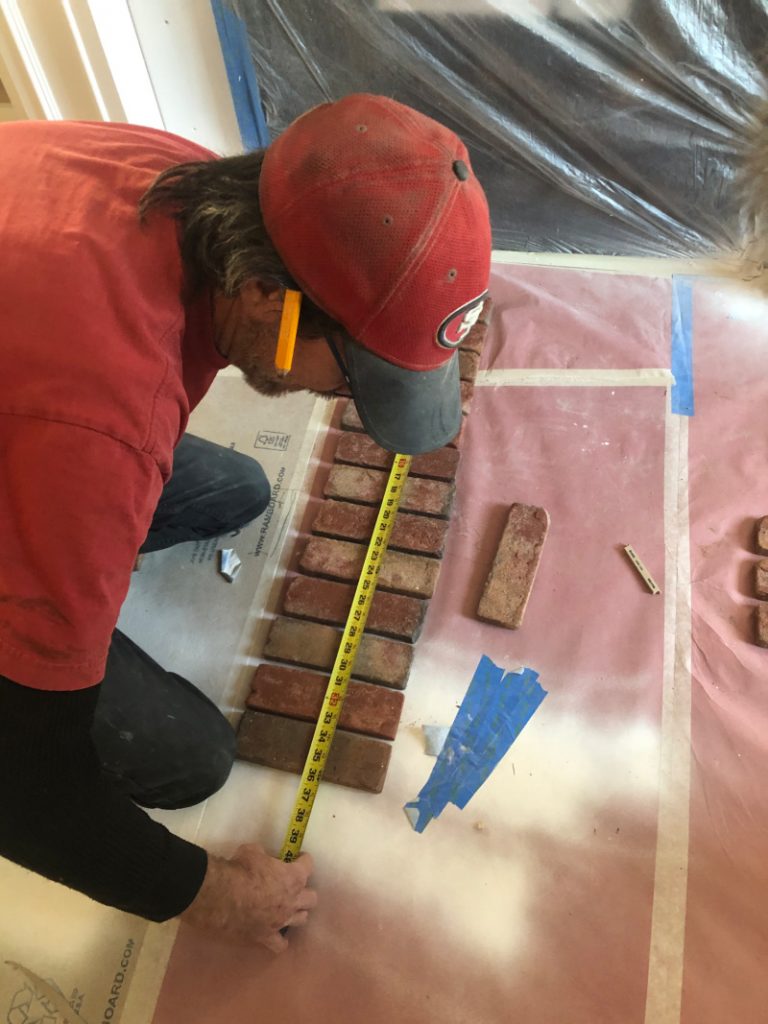
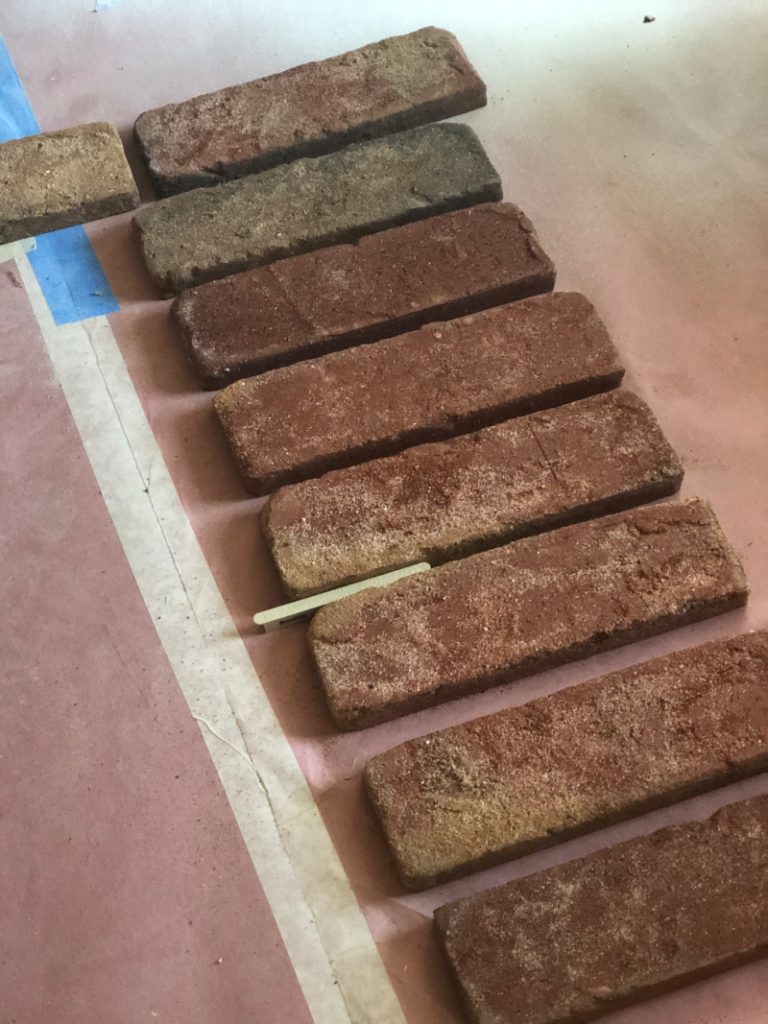
Trevor lays out the brick fireplace surround.
Did someone say home stretch?!!!
As is always the case with any sort of renovation or new build, deadlines get extended. Snowberry was no exception.
That said, our furniture was arriving, our lease was up and we were moving in.
It’s not ideal to move into a house that’s still in process and I did everything in my power to avoid it … yet here we are.
AFTER
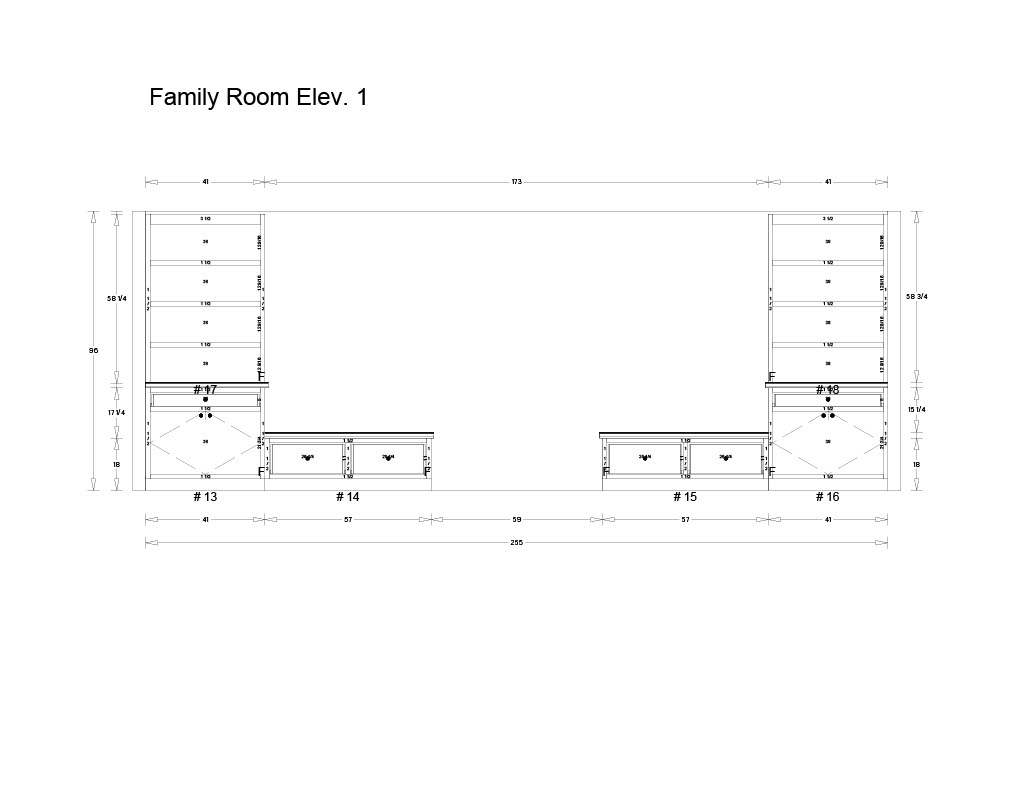
Before I ordered our sectional sofa, Mary Ann of Classic Casual Home created a floor plan incorporating the pieces I hoped to purchase.
Miraculously it all fit … on paper.
The layout also helped determine the right sized area rug.
I like a rug that floats all of the furniture with plenty of room to spare.
This proposed layout shows a 12 x 15 area rug which is perfect.
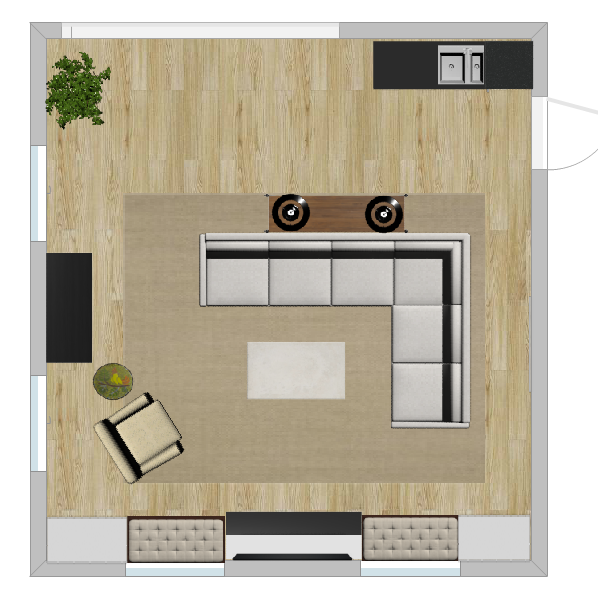
Classic Casual Home
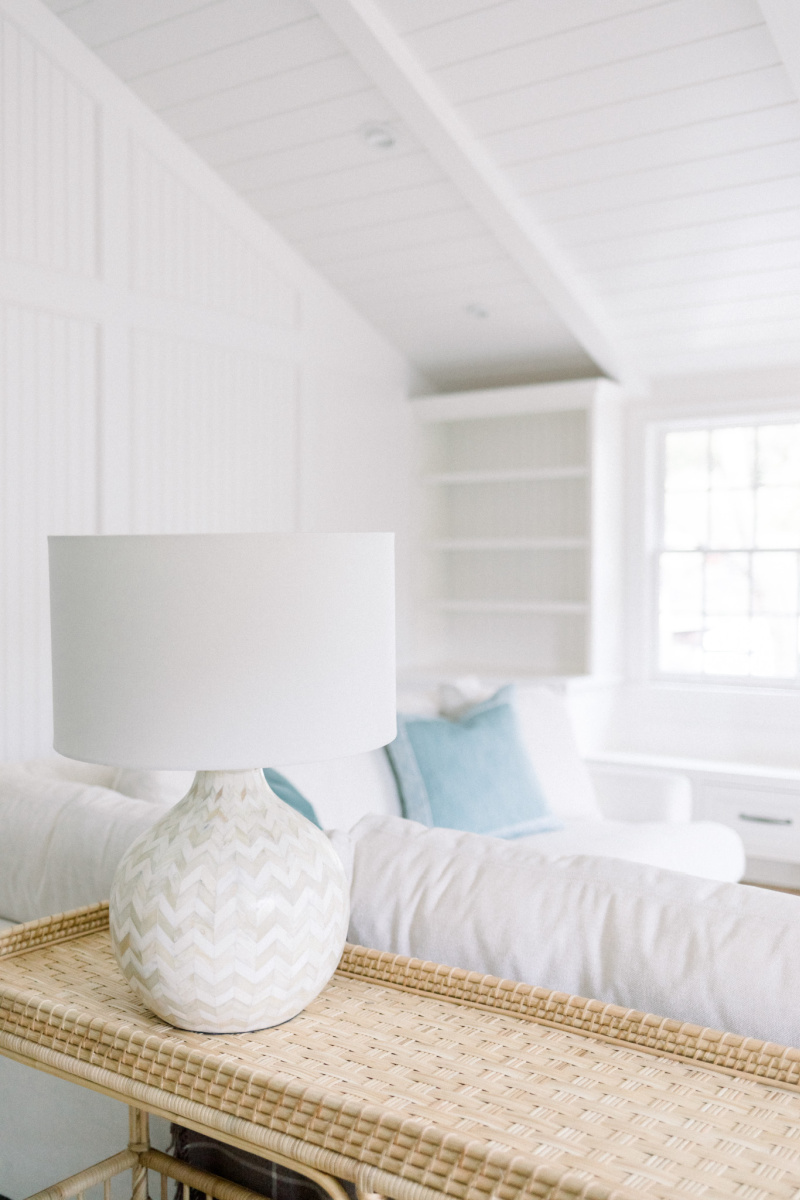
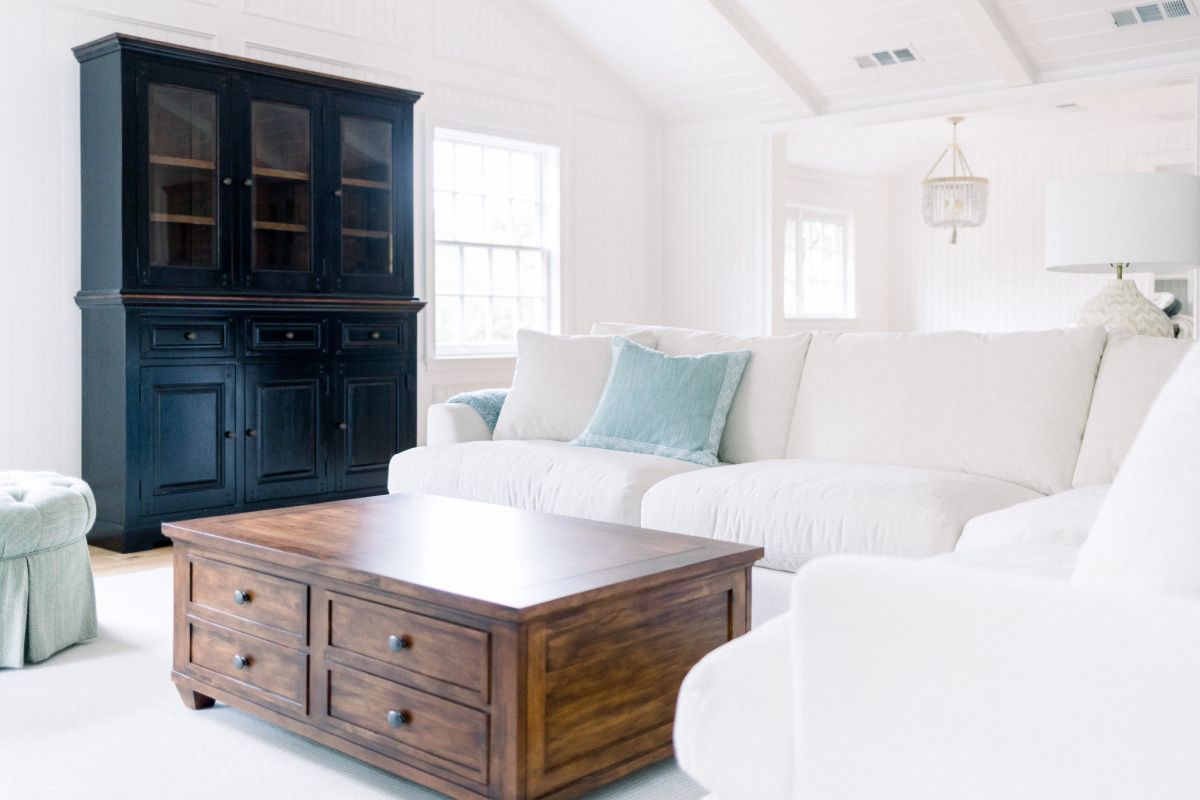
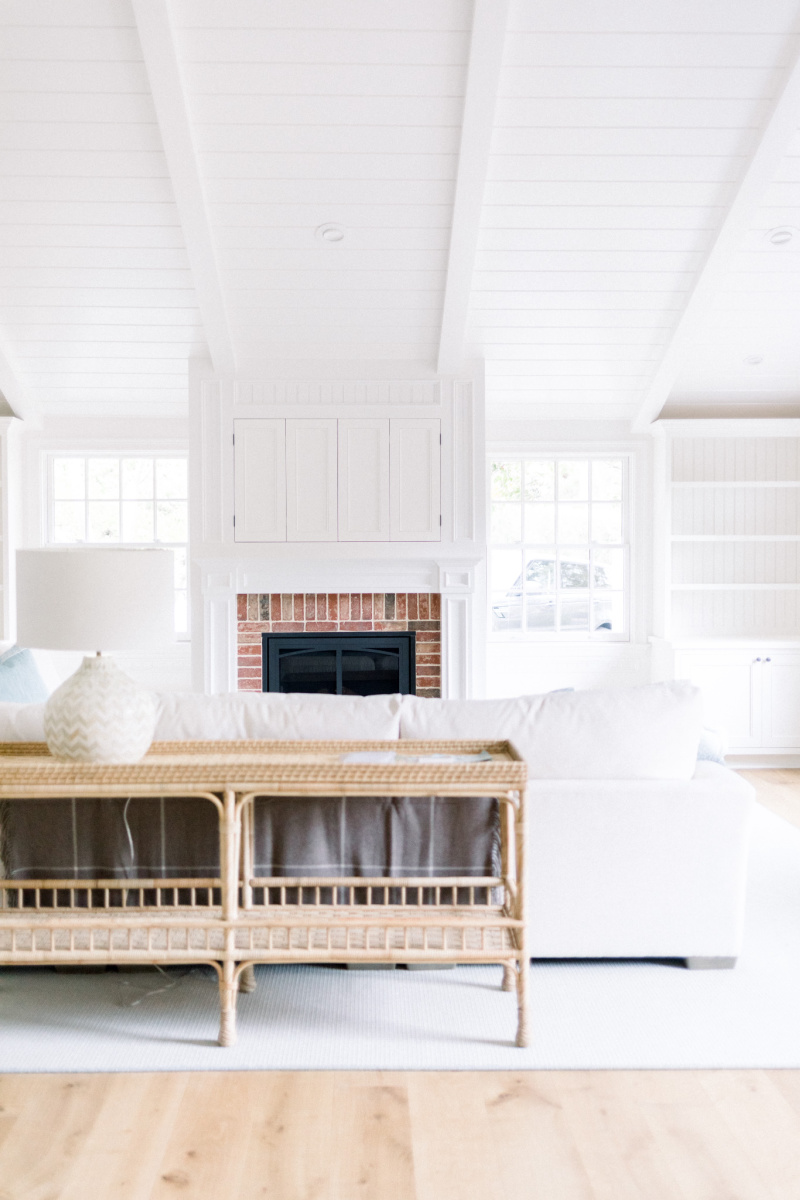
To da … the finished room after some of the new furniture arrived.
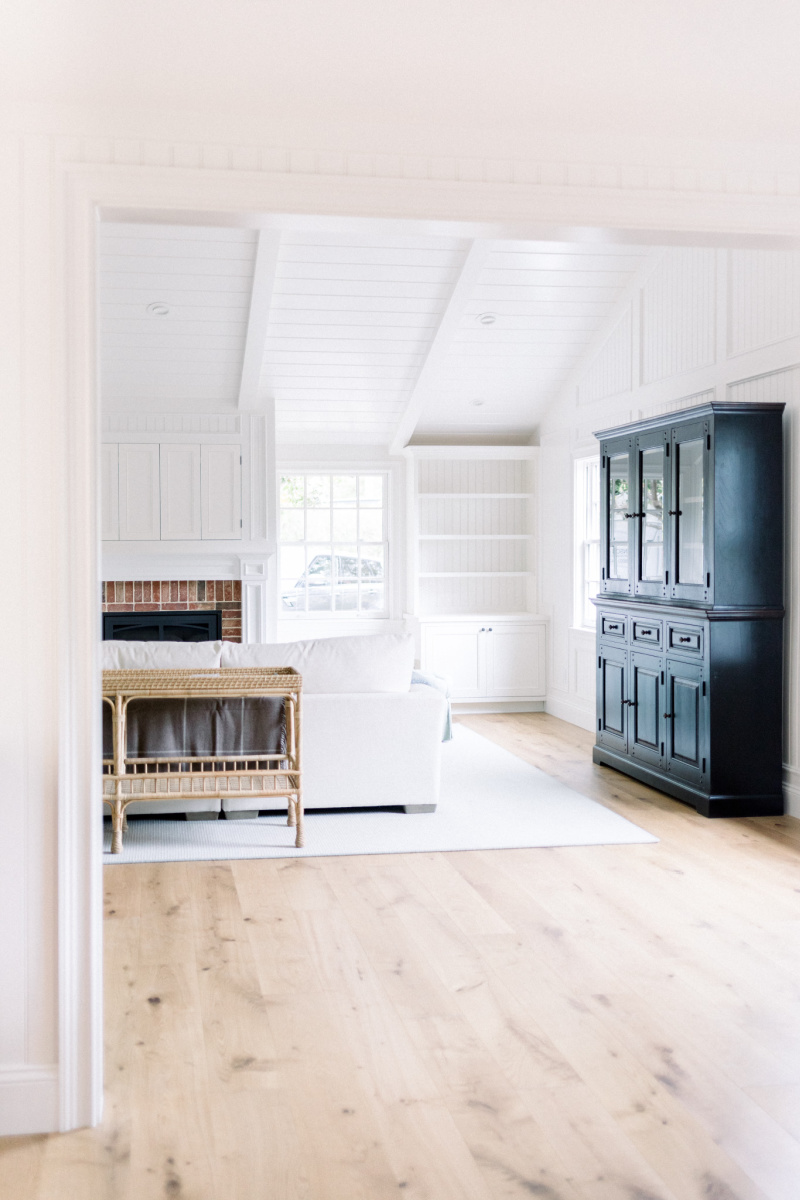
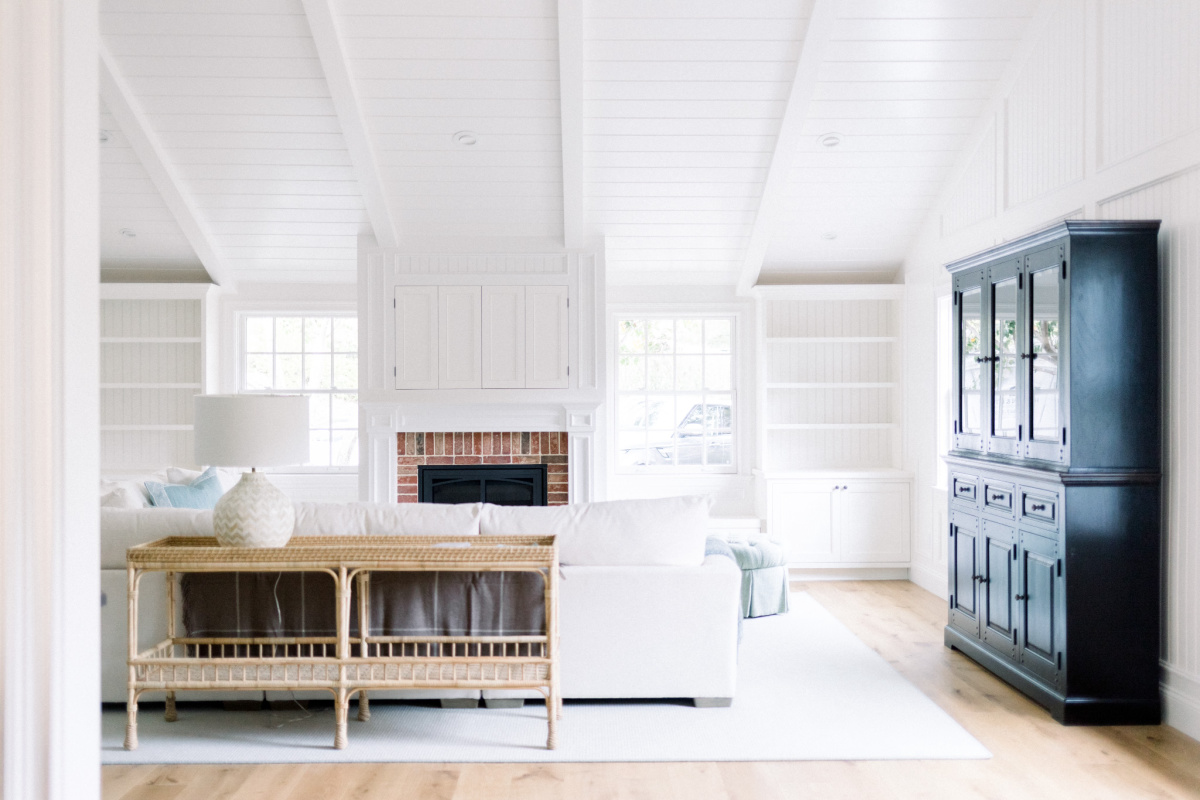
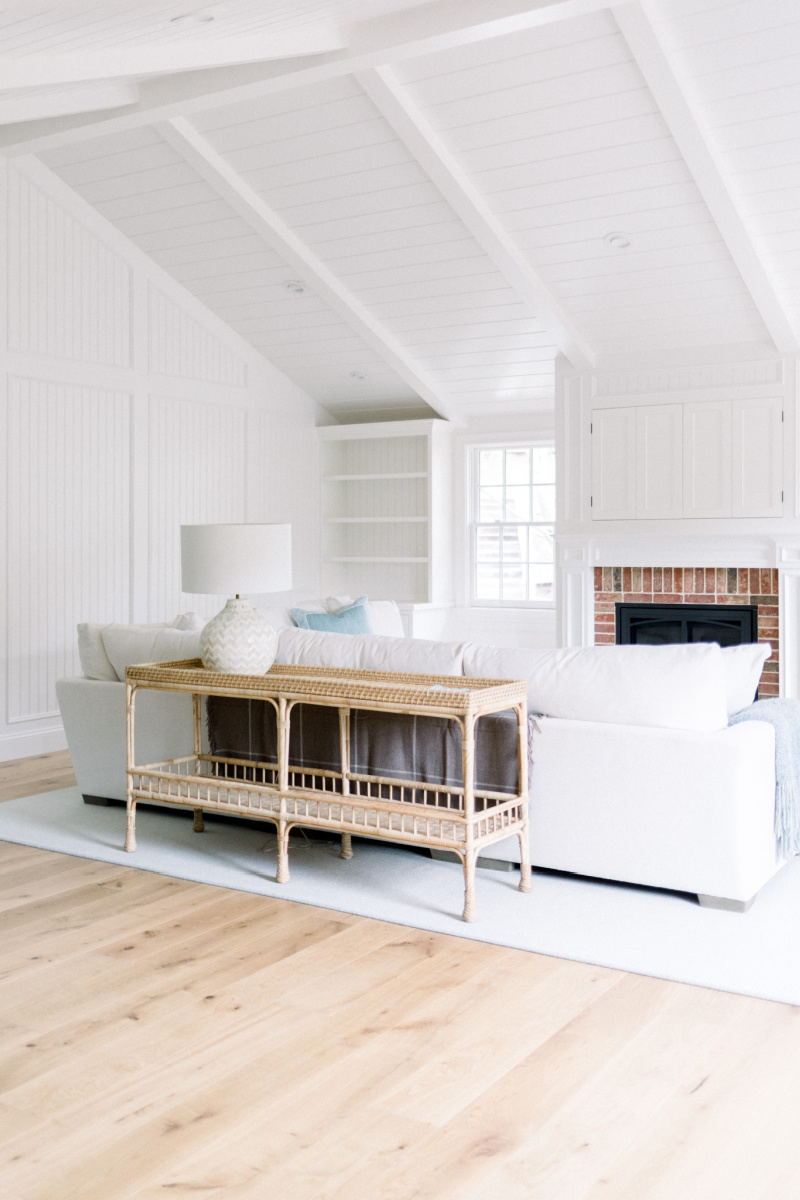
The console table behind the sofa is the first piece of furniture I bought for Snowberry.
At the Serena & Lily outlet.
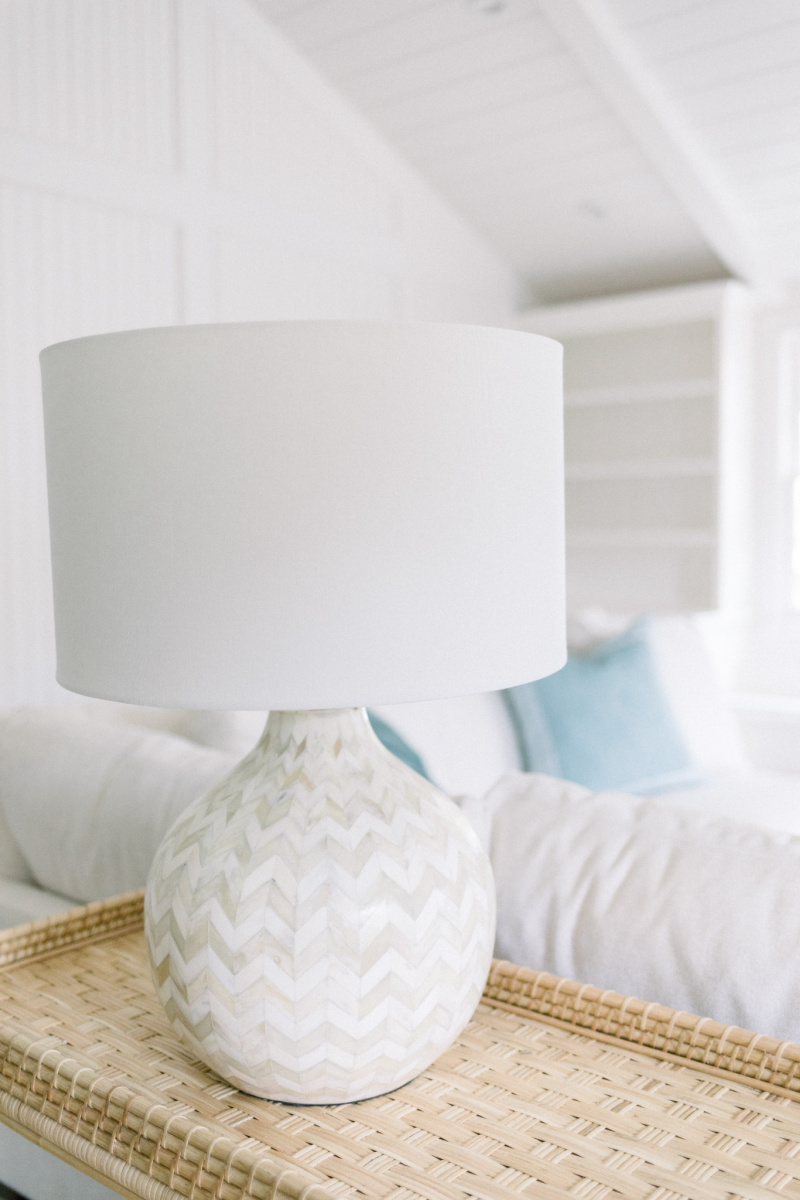
And the lamp is one of the few pieces that came with us from our Fidalgo Island house.
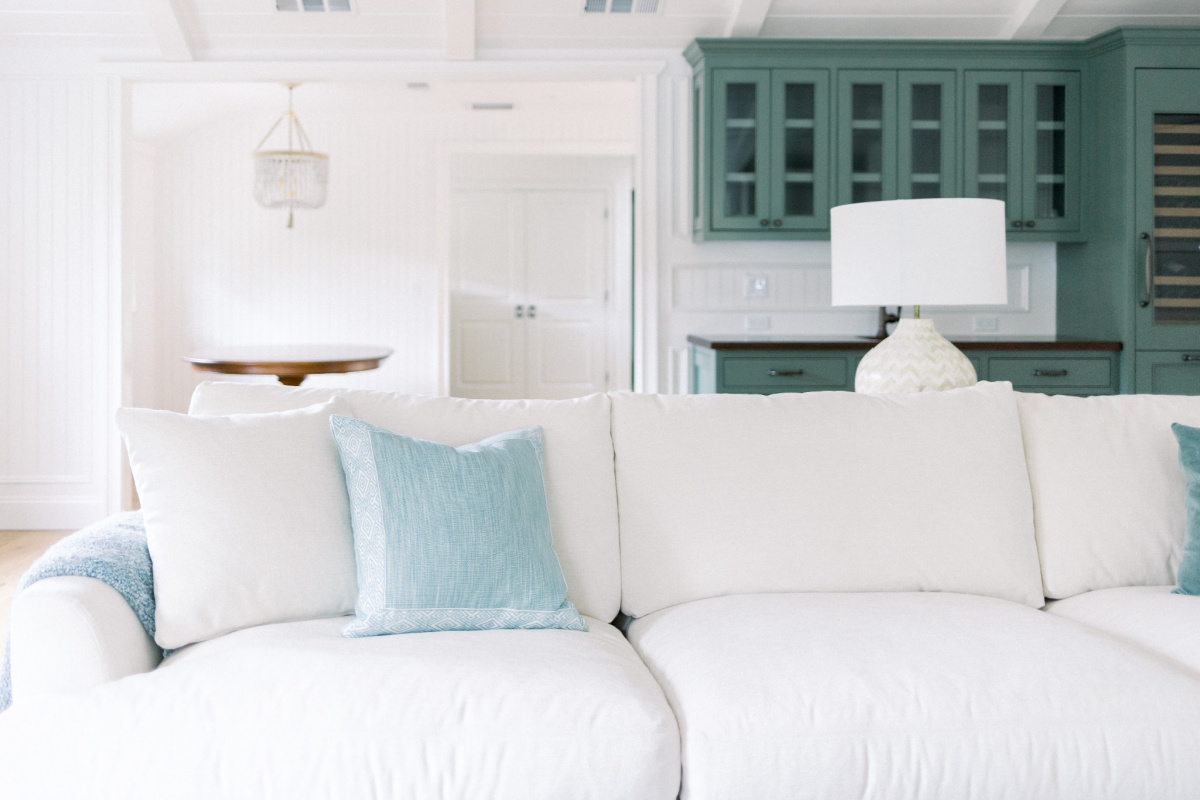
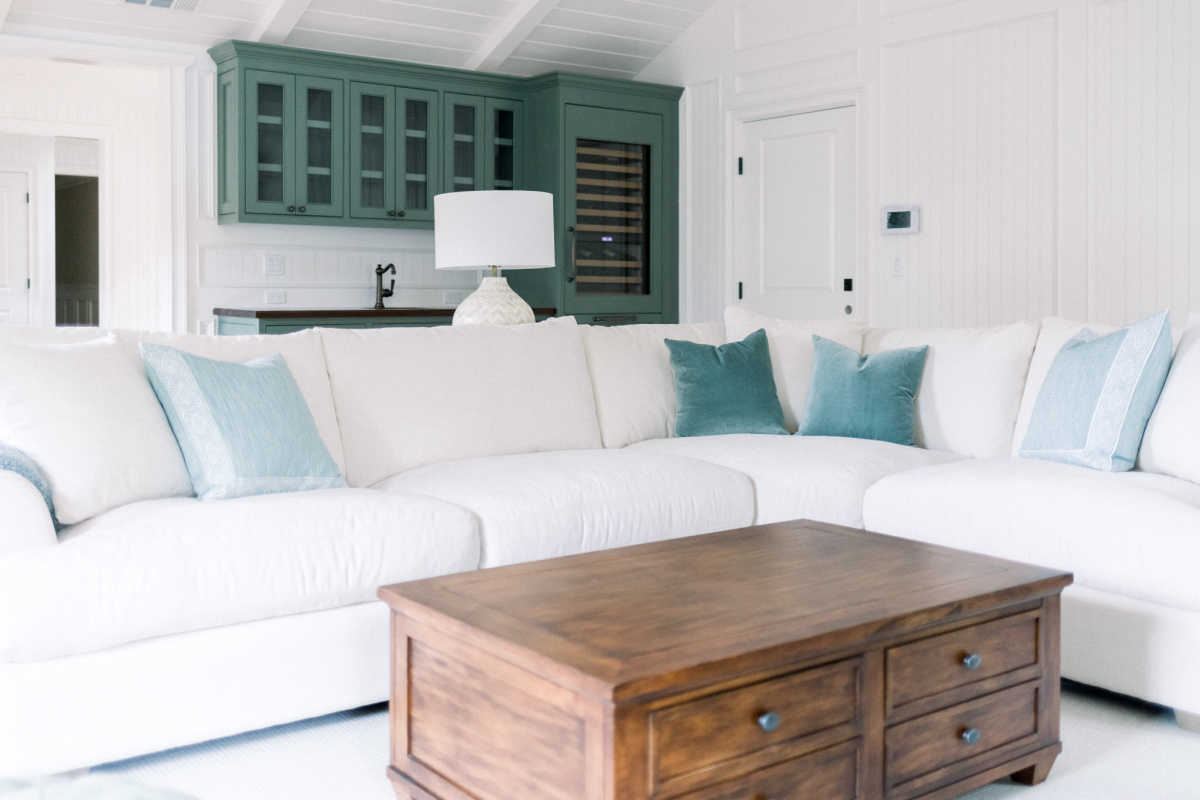
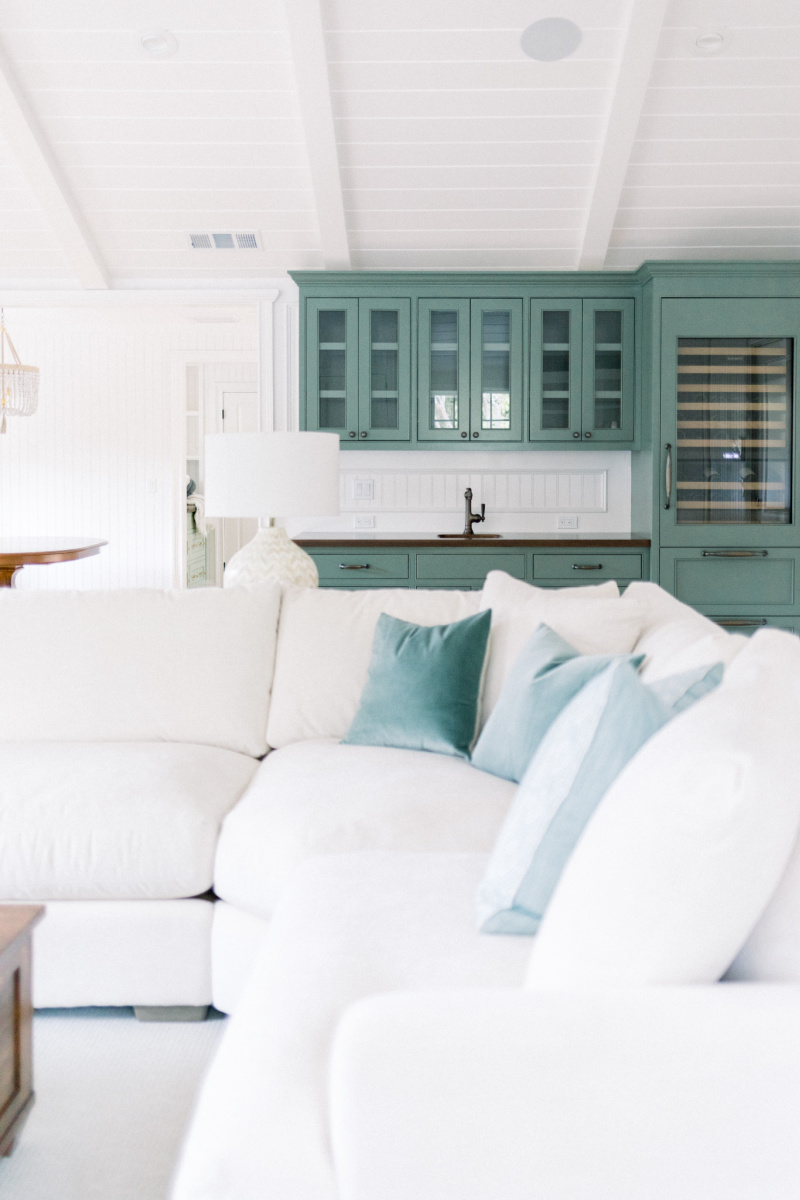
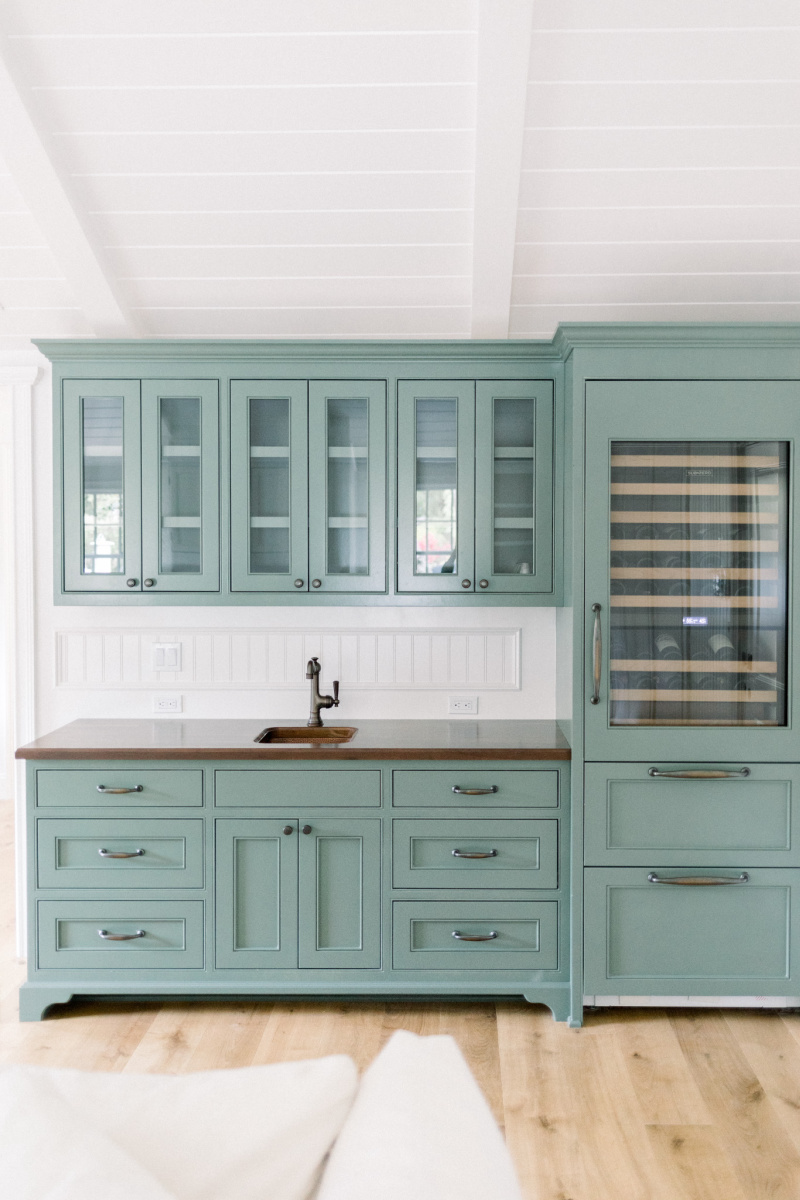
In the back of the room (where the weird laundry/mud room used to loom) is our beverage bar.
Instead of a full size wine refrigerator, we chose one with refrigerator and freezer drawers.
The upper section holds 86 wine bottles and also includes a humidor.
You can glimpse our casual dining area between the bar and kitchen.
There’s a story here, but I’ll save that for another day.
The cabinetry is inset with flat front drawers and a bead detail on the lower drawers and upper doors.
In this photo the wine fridge toe kick plate is missing.
So there you have it … Snowberry’s family room renovation before, during and after.
This is, of course, before the finishing touches.
WHAT’S NEXT?
Next up I’ll share the finished room including all the furniture sources.
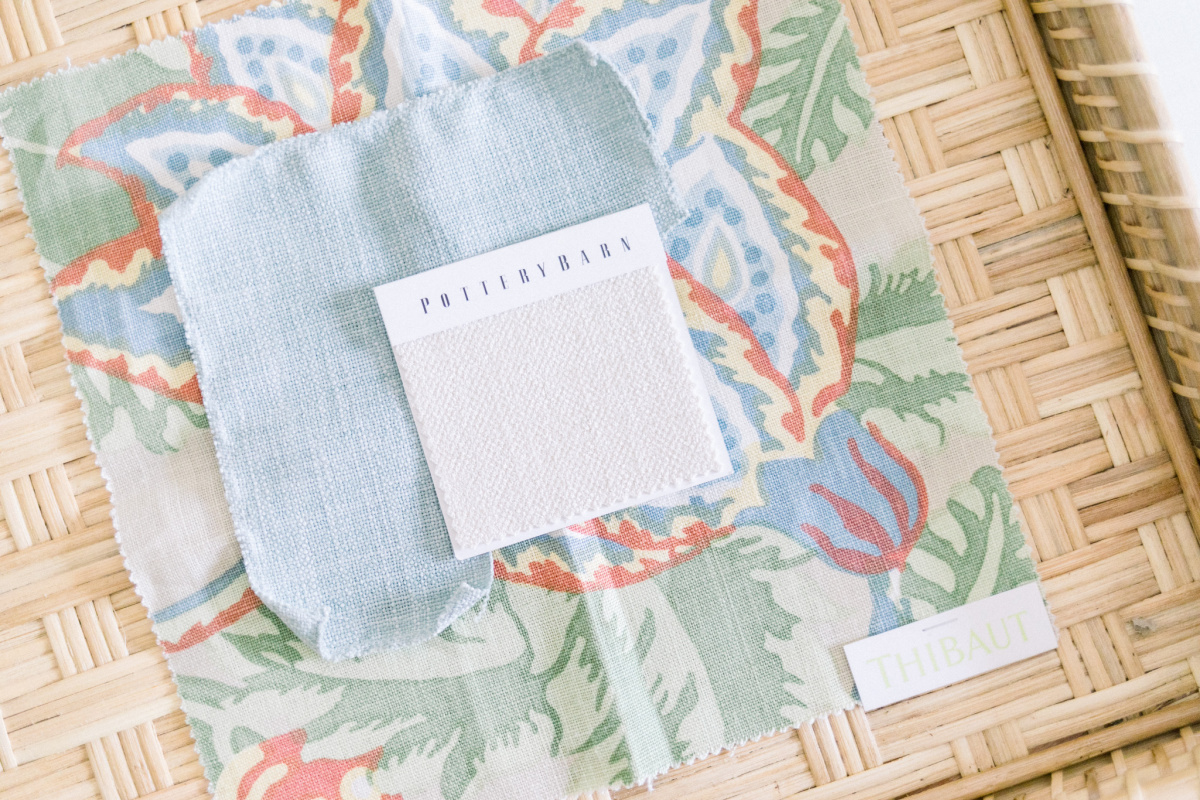
The jumping off point is Thibault’s colorful Mitford linen fabric.
Mary Ann of Classic Casual Home took me to the San Francisco Design Center to source the fabrics and trims for the window coverings, pillows and chairs and I’m excited to share all of it with you.
Want to learn more about Snowberry’s renovation …
Interior Color Palette, Part One & Part Two
PIN THE POST ~

As always, I appreciate your visit and welcome your thoughts in the comments below.
Cheers from Snowberry!
Material Sources:
Windows: Pella Architect double hung windows
Floors: Duchateau, Chateau Collection in Basal
Walls: 3-3/8″ beaded paneling
Ceiling: 8″-wide v-groove board
Fireplace insert: Regency Fireplace, Bellavista gas 36″ fireplace w/vignette trim in black
Fireplace brick surround: McNear’s Balmoral clay brick and Bostik grout in Linen H163
Cabinetry: Cabinet Masters, Concord, California
Cabinet hardware: Classic Brass Hutter pulls & knobs in oil rubbed bronze
Bar faucet: Newport Brass Jacobean bar faucet in oil rubbed bronze
Bar sink: Thompson Traders, Tamayo bar sink in hammered copper
Bar counter: Walnut butcher block
Wine refrigerator: Subzero 30” Integrated Wine Storage (panel ready)
Wall, ceiling, built-in and trim paint: Benjamin Moore, Chantilly Lace OC-65
Bar cabinetry paint: Farrow & Ball, Green Smoke No. 47 (color matched by Benjamin Moore)
General Contractor: C Cubed Construction, Danville, California


Reader Interactions